For Jim2Cloud clients, please see here for Tyro setup.
Tyro Prerequisites
To implement Tyro integration the following is required:
▪Jim2 Retail Option.
▪An updated Jim2 key with Tyro enabled.
▪A Tyro merchant account.
|
Please contact sales@happen.biz for further information on obtaining a Tyro merchant account. |
Tyro Installation
Install the Tyro Software on the Jim2 Client computer that needs to access the Tyro EFTPOS terminal, eg. the POS or accounts systems.
Refer to the Tyro Terminal Adapter Installation Guide on the Tyro website (https://help.tyro.com/s/article/How-do-I-install-the-Tyro-Terminal-Adapter – copy and paste this link into a browser) for more information on how to set up and install the Tyro software and terminal.
Jim2 Tyro Setup
Once the Tyro Software is installed on the Jim2 Client computer, enable Tyro within Jim2 as follows:
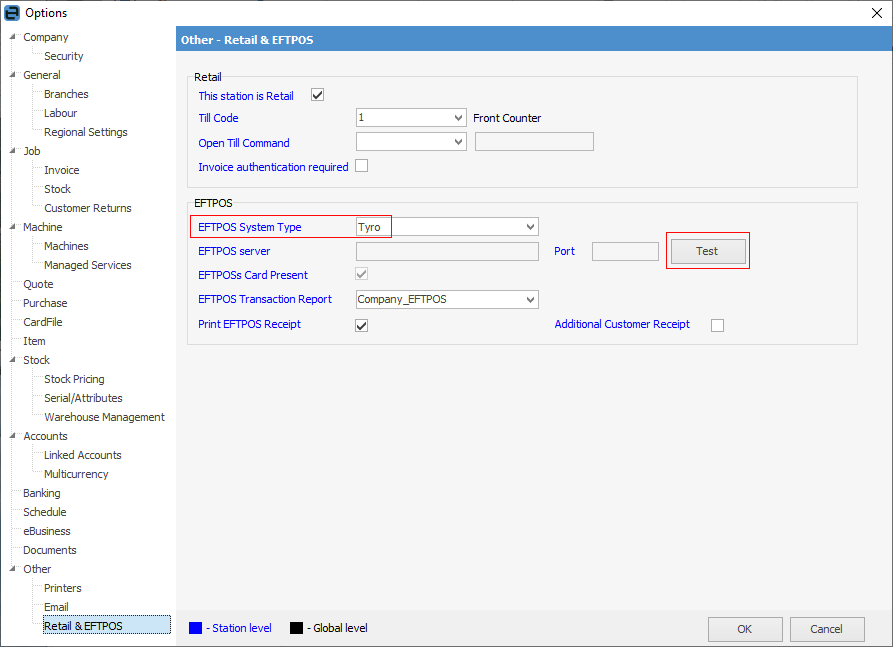
1.On the ribbon go to Tools > Options > Retail & EFTPOS.
2.Change the EFTPOS System Type to Tyro.
3.Click Test to confirm that the Jim2 Client can communicate with the Tyro terminal.

The above options are all workstation specific.
Set up a Tyro Payment Type
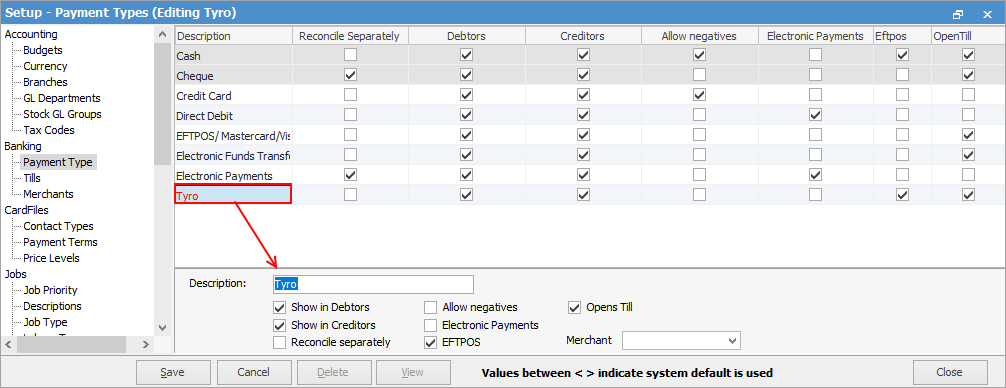
From Tools > Setups > Banking > Payment Type, add a new payment type and tick to enable EFTPOS.

All payments and refunds using this payment type will now automatically use Tyro EFTPOS as the payment method, and will trigger the Tyro terminal.
Usage
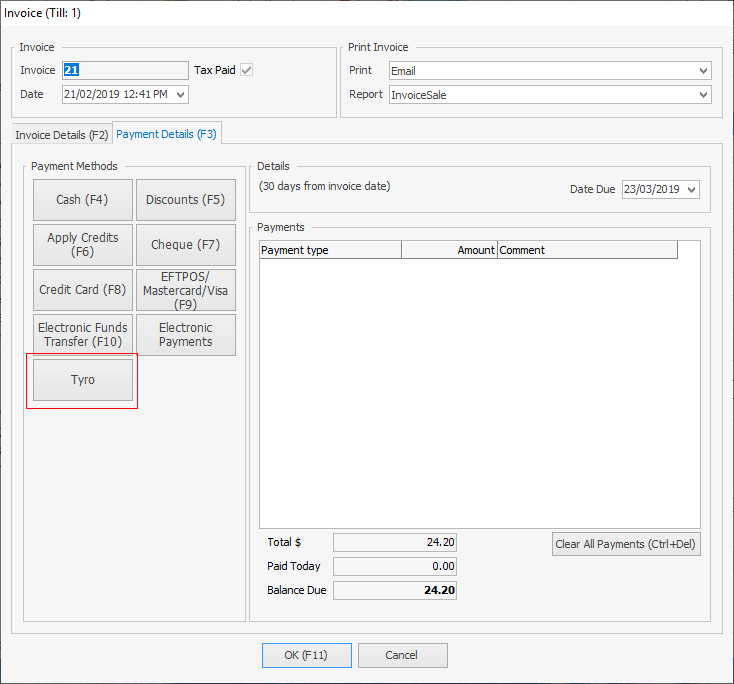
When invoicing, the payment type will be available (eg. Tyro or EFTPOS, as per the description in Payment Type) in the Invoice screen.

Select Tyro and the EFTPOS screen will appear with the amount entered. Click OK, and follow the instructions to process the payment from the card (eg. swipe card, enter pin, etc.).
|
Tyro EFTPOS can be cancelled halfway through the transaction if necessary. |
When finished, Jim2 has received the payment and is ready to process the invoice.
The payment type will also appear on the invoice.
|
▪Only one EFTPOS system can be used at a time per workstation, ie. PC-EFTPOS and Tyro cannot be used at the same time on the same workstation. ▪If there are multiple EFTPOS types in the Jim2 network, it is advised to use different tills and different payment types to distinguish the payments. This will also make till reconciliation easier. |
Further information
Settings to Speed up Invoicing
Create a Manual Payment for EFTPOS
