For Jim2 on premises, please see here for Tyro setup.
Tyro Prerequisites
To implement Tyro in Jim2, the following is required:
▪Jim2 Retail option.
▪An updated Jim2 key with Tyro enabled.
▪A Tyro merchant account.
|
Contact sales@happen.biz for further information on obtaining the updated Jim2 key and a Tyro merchant account. |
Tyro Installation
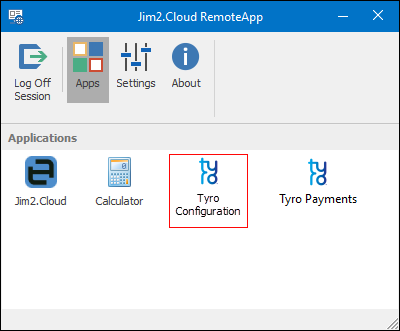
The Tyro configuration is available via the additional published application in RemoteApp.

|
Note: The Tyro icons will only appear for those users who have been set up to use Tyro. This needs to be done by Happen Business. |
Pairing Tyro
▪Go to the Jim2 Remote Cloud and select the Tyro app.
▪Go to Pairing, and make sure TID, MID and name are correct, then select Pair. It will start to count.
▪Go to the POS terminal and click on Pair Tyro button from the Menu button at top right.
▪Enter the TID and MID.
▪Click on Pair and enter Start on the pinpad.
▪Once Pairing has completed successfully, return to the home screen of the pinpad.
Refer to the Tyro document Tyro Terminal Adapter Installation Guide (https://help.tyro.com/s/article/How-do-I-install-the-Tyro-Terminal-Adapter – copy and paste this link into a browser) for more information on how to set up and pair the Tyro software and terminal.
|
Within the Tyro Configuration app is where to adjust the printer options. |
Jim2 Tyro Setup
Enable Tyro within Jim2 (via desktop) as follows:
▪On the ribbon, go to Tools > Options > Retail & EFTPOS.
▪Change the EFTPOS System Type to Tyro.
▪Tap Test to confirm that the Jim2 Client can communicate with the Tyro terminal.
|
The above options are all workstation-specific. |
Jim2 Tyro Usage
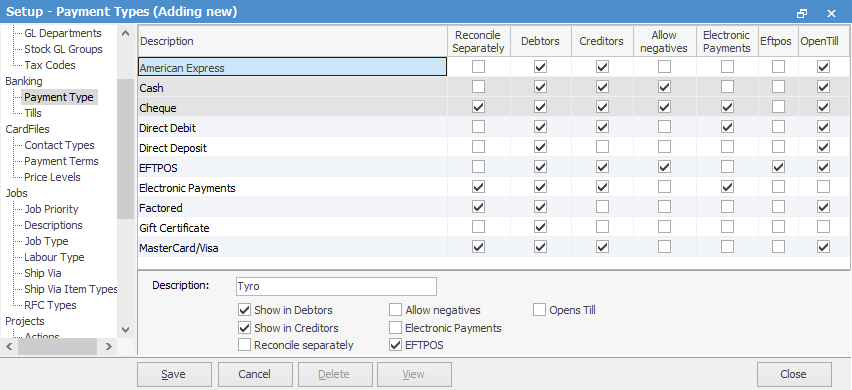
On the Jim2 ribbon, go to Tools > Setups > Banking > Payment Types and add a new payment type for Tyro, then tick EFTPOS.

All payments and refunds using this payment type will now automatically use Tyro EFTPOS as the payment method.
Further information
Jim2Cloud Technical Requirements
Jim2Cloud Setup and Access for PC
Jim2Cloud Setup and Access for MAC
Jim2 Cloud Local Region Setting
Add a Document to Link to On Premises Document
Add a Document Within Jim2Cloud
Import Files from Your PC to Jim2Cloud
Open or Save Files from Jim2Cloud
