The following explains how to set up a parent/child stock code in Jim2 so that it shows up in Jim2Commerce as a product with attributes. In this example, we will use a product called WebRock which has 4 coloured attributes.
A parent stock code in Jim2 is set up to represent the product in Jim2Commerce. To add attributes to this product, we will set up linked stock in Jim2 via a parent stock code.
This image shows the parent product in green, along with all the data associated with it when synced to Jim2Commerce. The Child product attributes are represented in blue showing all the data that is associated.
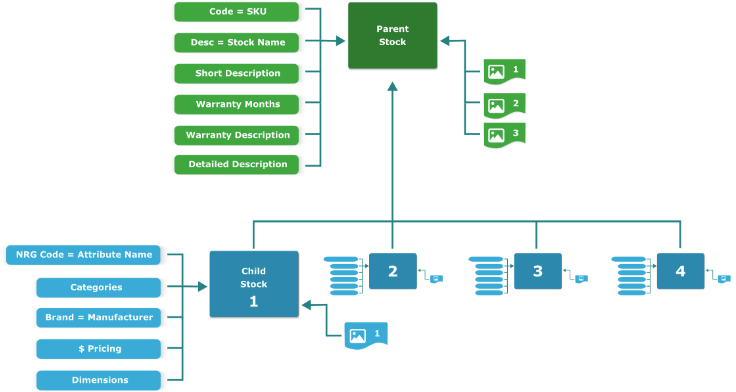
The parent product becomes the reference point on the website for the title and description. It also contains the link to the initial product image to be shown on the site.
Go to Stock > Create Stock. Enter the details of your parent stock. This stock needs to be set up as Virtual stock type to ensure users do not attempt to use it on purchase orders and jobs.
Stock tab 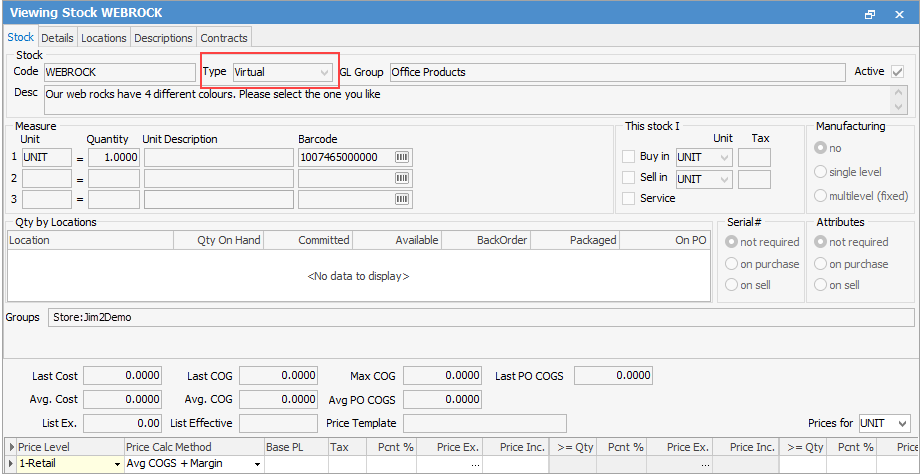
The following must be entered: ▪Webcode = Stock Code ▪Desc = Product Name ▪Type must be Virtual ▪Pricing ▪Store non report group allocated for your store. The Store:Jim2 Demo will be used in the example. This is to be performed for both the parent and child products. 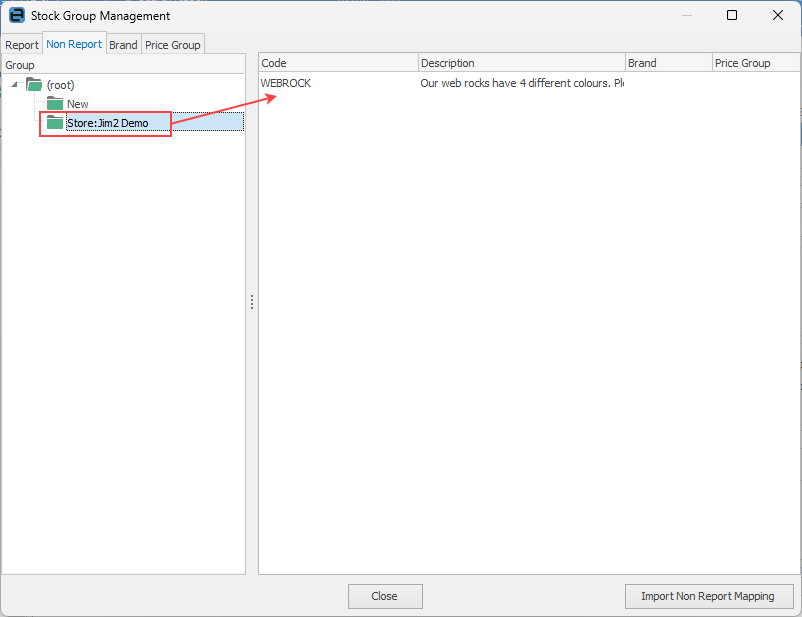 ▪Groups –Report Groups defining Categories –Non Report Groups defining Categories –Brand .
Details tab 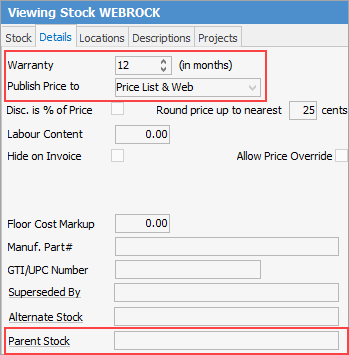 ▪Warranty value in months ▪Publish to Jim2Commerce – Publish Price to = Web or Price List & Web ▪Note the Parent Stock field should be left blank.
Descriptions tab 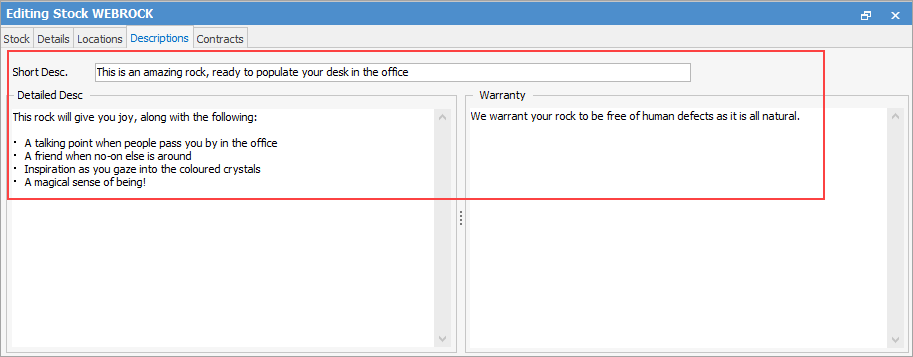 ▪Short Desc ▪Detailed Description (can be styled using HTML) ▪Warranty text
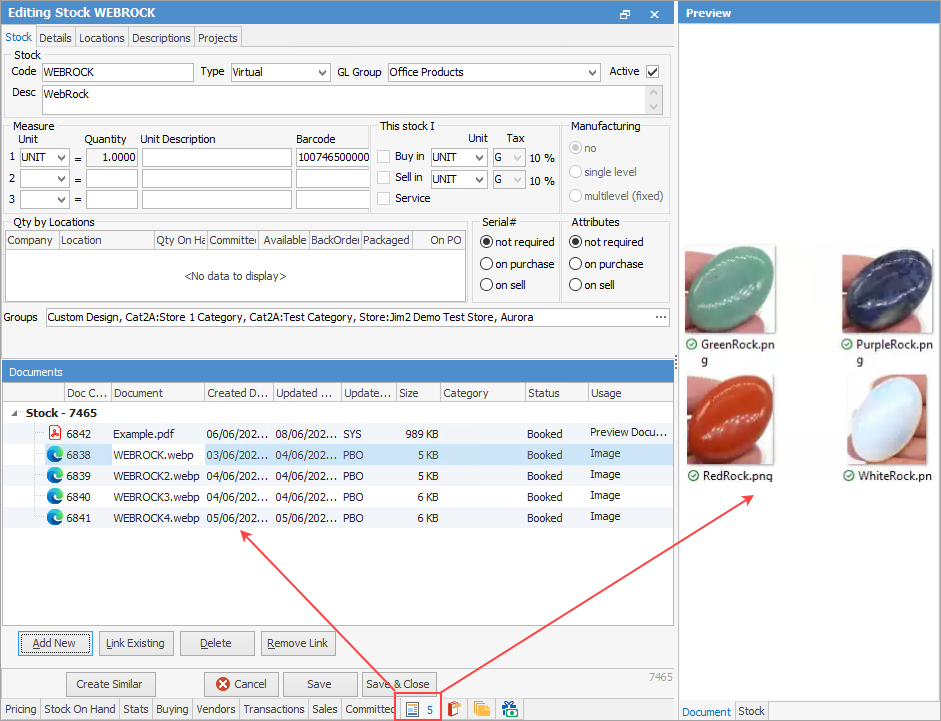
Product Images – General The images that you would like to be seen when customers arrive at the product page are to be allocated to the parent stock code. These images are not linked to any attribute. Attribute is allocated to the child stock code as described in the Product Attribute section below.
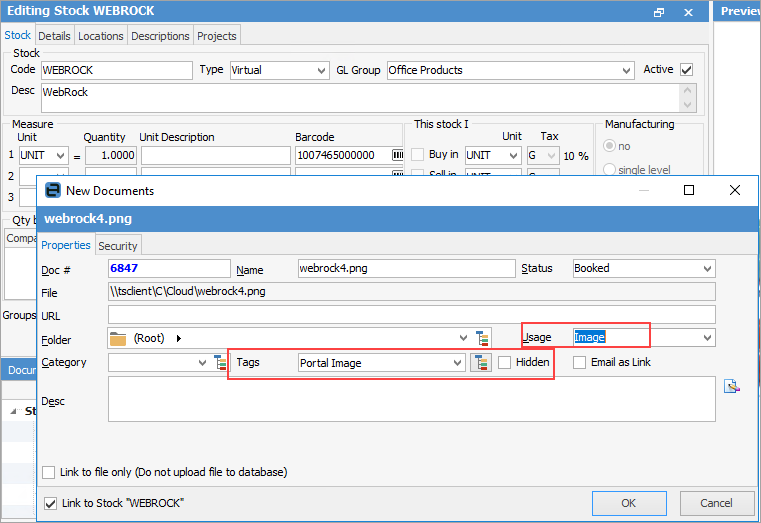
Go to the Documents tab, click Edit, then Add New. Select your image file, allocate these settings: ▪Tags = Portal Parent Image ▪Hidden = Unchecked ▪Usage = Image
Select OK to add to your image list.
PDF Attachments If you wish to show data sheets, size charts, brochures, etc. with your Jim2Commerce product, these need to be uploaded for them to show in the attachments area.
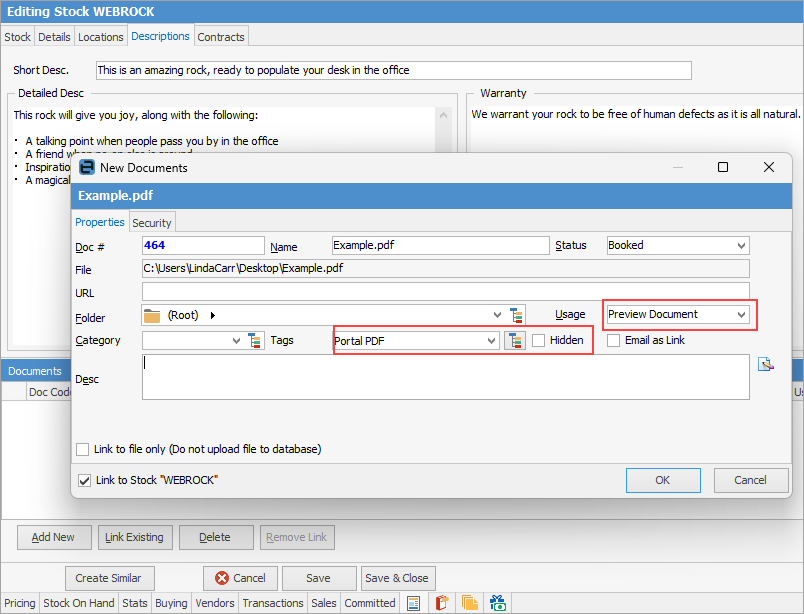
Go to the Documents tab, click Edit, then Add New. Select your PDF file, allocate Tags. There is a choice of three tags. Select the one that is most appropriate for your document type. You can allocate your attachment to: ▪Portal PDF (typically brochures) ▪Portal Product Sheet ▪Portal Size Chart
Allocate these settings: ▪Hidden = unchecked ▪Usage = Preview Document
Click OK to add your document to the stock code.
 |
 Product attributes (child products)
Child products are separate stock items in Jim2 that are connected via a parent link to the virtual stock created above. These stock codes will sync to Jim2Commerce and appear in the form of an attribute of the parent product.
Child Stock 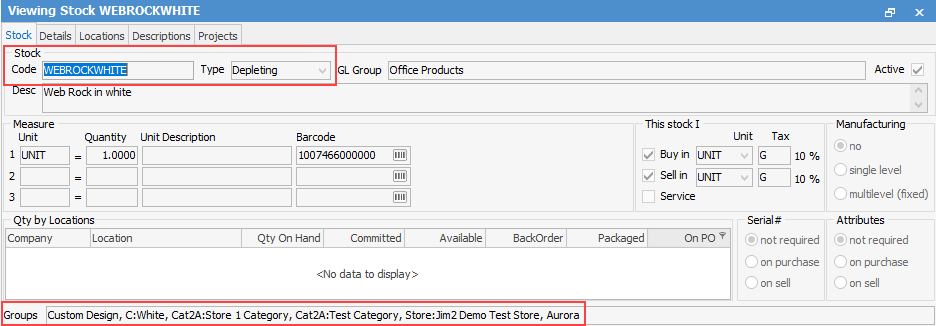
Add child stock: ▪Stock Code – A code that represents the parent stockcode with an attribute (Eg. WebRockWhite) ▪Set to type Depleting ▪Set non report group for the store (same as for the parent) ▪Set non report group to the attribute value (In this example we show C:White for the white colour attribute) 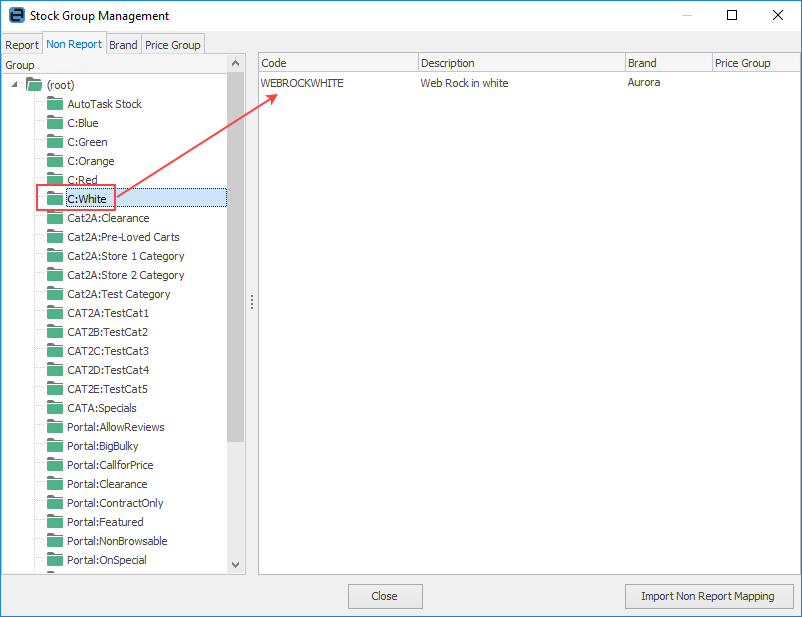 ▪Report group to define Category ▪Non Report Group –Extra Categories –Extra features such as Bulky items etc. ▪Pricing – if a different price is allocated to this product it will show as this price in Jim2Commerce .
Details tab 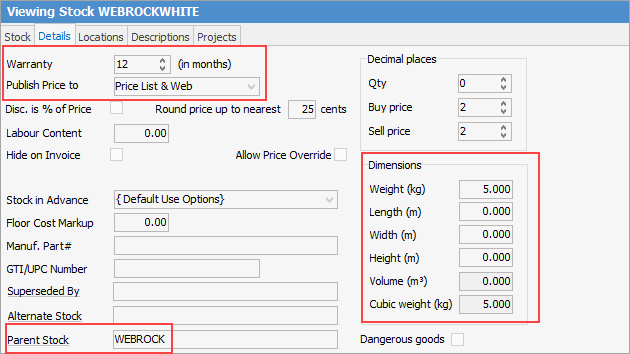
Set the product to be published on the Web (same as parent stock code). Select WEBROCK in the Parent Stock field.
Image allocation (optional – following steps above in parent stock) to Documents (only one image will be used in Jim2Commerce when the attribute is selected).
Product dimensions need to be added here if any Jim2 Freight implementation is used.
The process above needs to be performed for each child stock code (attribute) that needs to be allocated to the parent stock code.
Create Similar To streamline your product input, the create similar stock functionality in Jim2 can be used.
Select an existing stock code that represents the Jim2Commerce attribute, then click Create Similar.
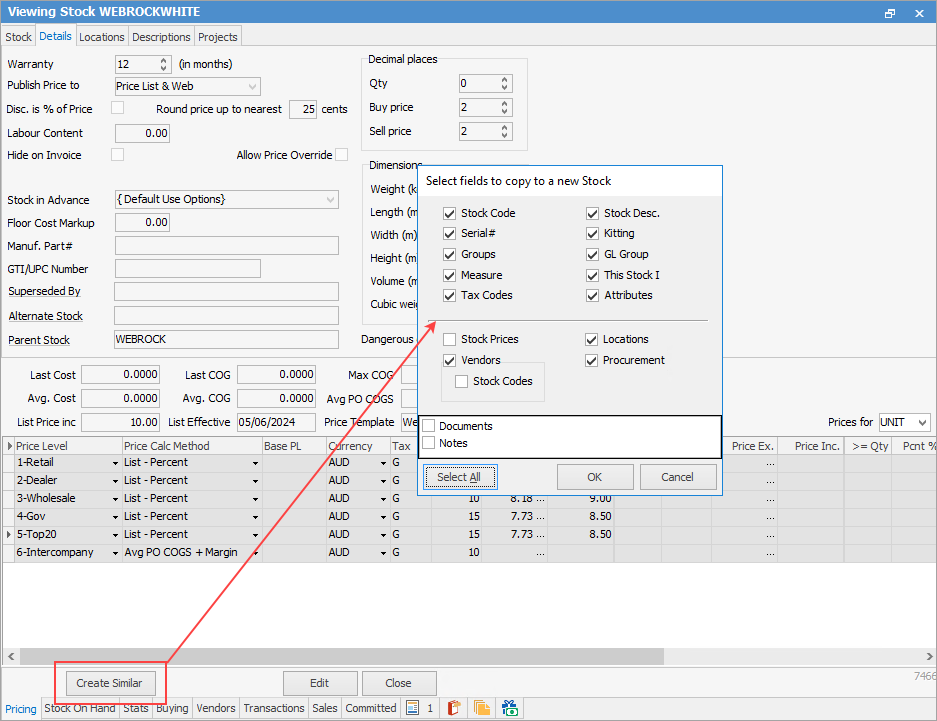 ▪Rename the new child stockcode to represent the new attribute In this case it will be WEBROCKGREEN ▪Save the stock code ▪Remove the old non report group and replace with the correct non report group 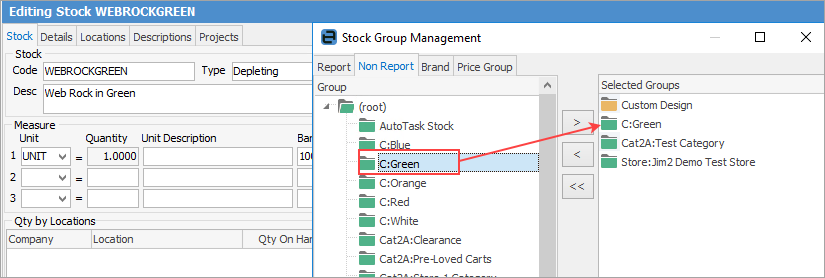 ▪Add in the Parent Stock Code in the details section. (currently this does not copy across through Create Similar Process) 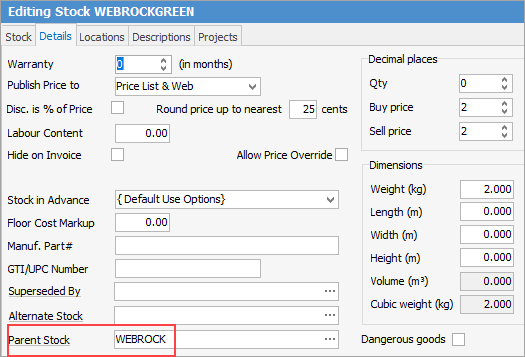 ▪Add a new image that represents the new attribute –Note the Documents checkbox was not ticked above, so we do not have to remove the old image . –In this case it will be a green version of the WebRock .
Attribute Images In Jim2Commerce, when selecting a product's attribute an associated image can be viewed. Only one image per attribute is needed as only one image will appear during selection. Any other images assigned at this level will be shown as general images (better to allocate these to the parent stock code).
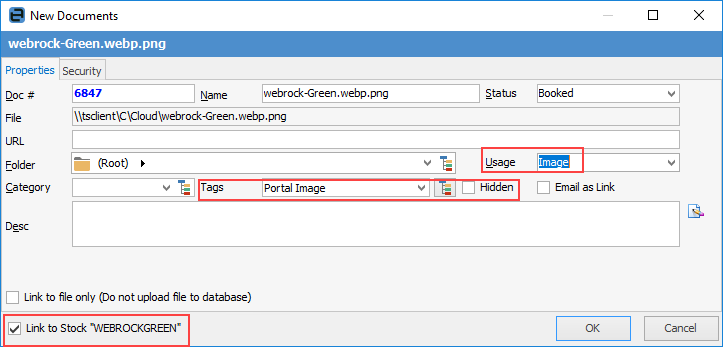
To allocate an image to a Child Stock item in Jim2 so it will show up when the attribute is selected, edit the child stock code (attribute), then go to the Documents tab. Click Add New, then select the image you would like to allocate from your file system, then select the following: ▪Tags = Portal Image ▪Hidden = untick ▪Usage = Image ▪Link to Stock – check name is correct. |
When working with these more complex products, it is important to check that the data is coming across correctly on the Jim2Commerce site.
On the Jim2Commerce portal, go to the Catalog > Products section and search for your product.
Select Edit to view the details. Check that the main details are in place.
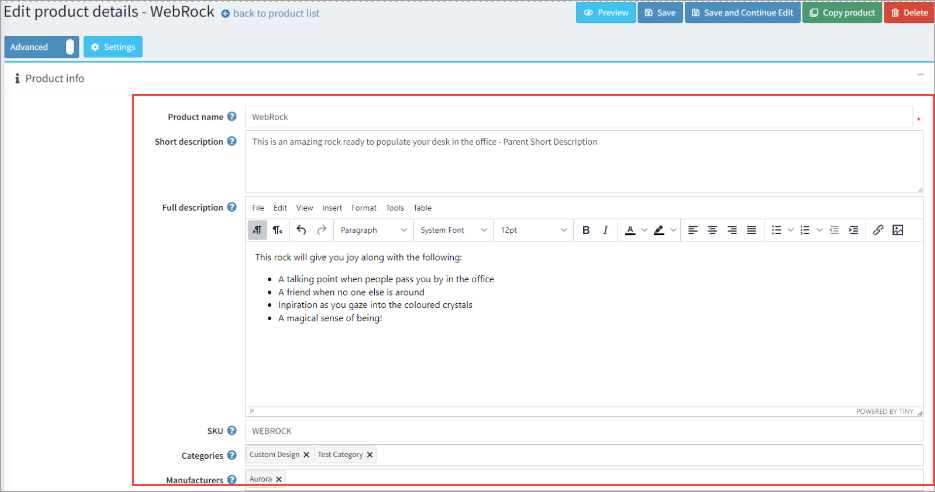
Next, check that the images have come across.
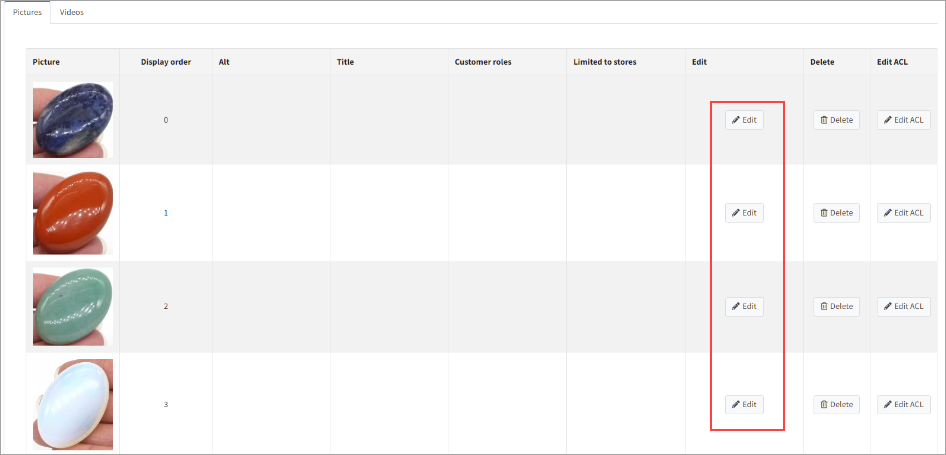
Then, check the child products have come across as product attributes in Jim2Commerce. Scroll down to the Product Attributes section, and go to the Attribute and select Edit. From there you will see the Attribute values that will correspond to your child products.
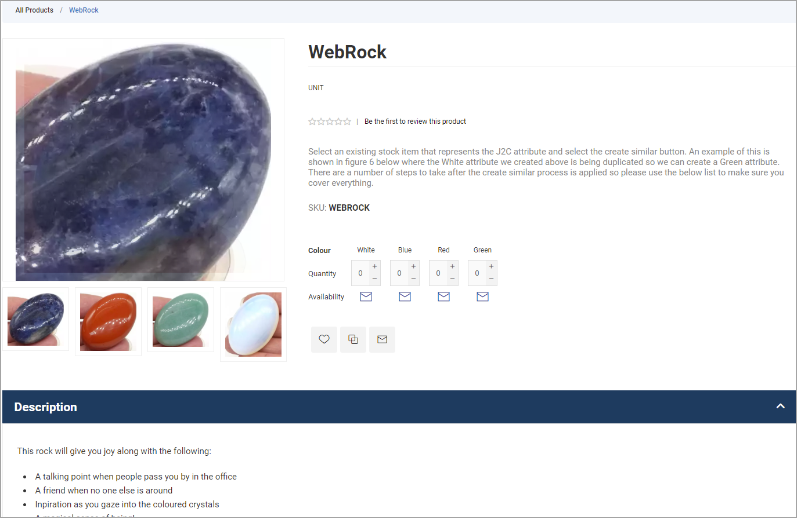 |
Further information
Jim2Commerce Quick Reference Guides
Jim2Commerce Contact Us Maps Setup
Jim2Commerce Content Management
Jim2Commerce Customer Specific Catalogues
Jim2Commerce Internal User Setup Impersonation
Jim2Commerce Linked Parent Child Portal Setup
Jim2Commerce Product Specifications Strategy
Jim2Commerce Ship Address Management
Jim2Commerce Stock – Attachments