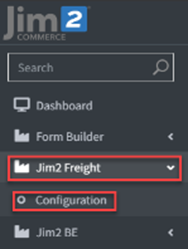
The Jim2Commerce (J2C) Freight system has extensive functionality to handle your shipping requirements.

Freight is accounted for via a freight stock code and ShipVia information in Jim2. Freight can be allocated to Stores and Customer Roles, handles pickups from your warehouse locations, and handles bulky and dangerous goods.
The J2C freight system is linked to Jim2 jobs ShipVia information. These ShipVia values are synced over to J2C via the green Sync ShipVia values button on the top right of the Jim2 Freight section. These types are then included in the JSON order send to Jim2 and populate the order ShipVia, based on the freight option selected at checkout.

Once the sync is performed, the ShipVia data from Jim2 populates the ShipVia list in J2C when setting up a freight method.

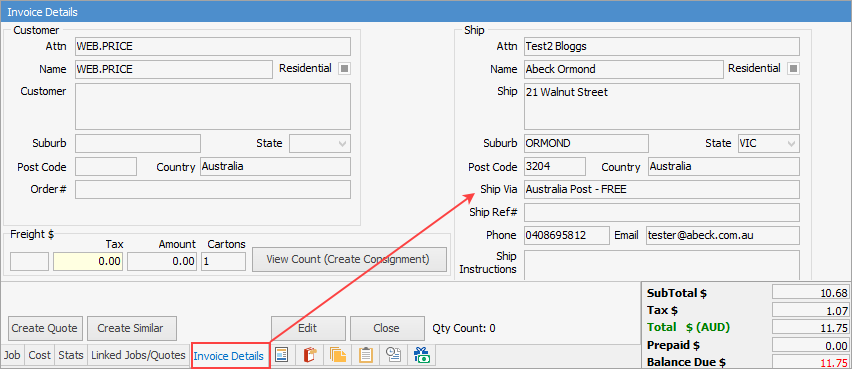
When an order comes through to Jim2 using a shipping method, the ShipVia field in Jim2 will be correctly populated in the Invoice Details tab of the job.
 |
This plugin provides a versatile option without the need for a fully integrated freight plugin, and allows the client as many freight rules as required.
Care should be taken to test and ensure overlapping rules are not created. This is particularly the case with Multi-Store setups
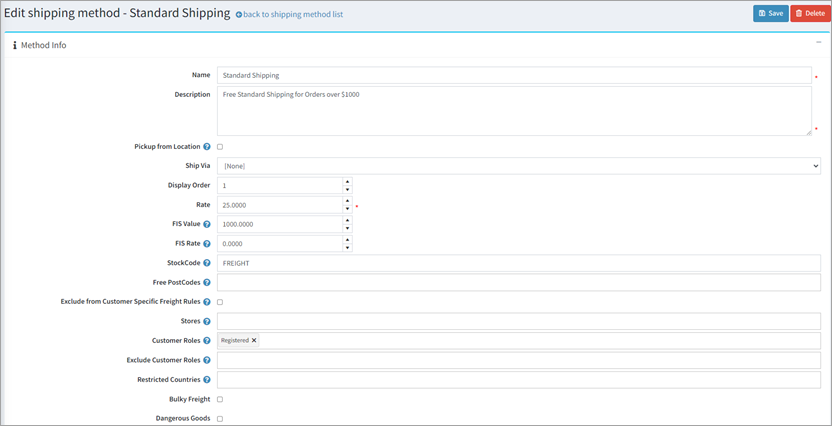
To add a freight method, select the blue + Add new button on the top right of the Freight Shipping Methods List screen. A new screen will appear ready to be filled out with your freight settings. Here is a summary of all the settings: ▪Name: Is the shipping option name displayed during checkout. ▪Description: Is the Description displayed during checkout.
▪Pickup from Location: This is used for multi-location pickups. See Shipping Warehouse setup below. ▪Ship Via: Set the default to be passed with order. ▪Display Order: Set the order of the methods displayed at checkout. ▪Rate: The amount to charge for this method. ▪FIS Value: The order $ amount before a discount can optionally be applied. ▪FIS Rate: The rate to apply when FIS value reached. ▪StockCode: The stock code passed for freight. If blank, the default from settings is used. ▪FreePostCodes: Applicable post codes are discounted to $0 (local areas). ▪Stores: The J2C store(s) that should use this method. ▪Customer Roles: Configure to show method to specific customers only. ▪Exclude Customer Roles: Configure to exclude from being shown to specific customers. ▪Bulky Freight: Apply an additional surcharge to bulk items per unit, or per order. ▪Dangerous Goods: Apply an additional surcharge to bulk items per unit, or per order.  |
When selecting either the Bulky Freight or Dangerous Goods checkboxes, they expand out to show pricing per unit or order, along with a message to show customers when selecting this freight method.
 |
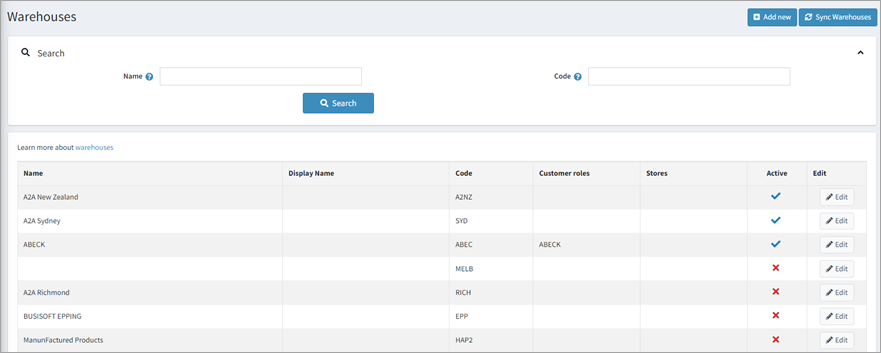
Your Store and Warehouse locations can be synced across from Jim2. This is performed via Configuration > Shipping > Warehouse in J2C. Make sure you have your Jim2 stock locations set up in Setup > Stock > Stock Locations.
Select the Sync Warehouses button to bring the list across. When syncing the stock locations from Jim2 to J2C, the entire list will come across. None of these will be set as Active.
To be able to use these with the Freight system, click Edit on the warehouse location and set to Active via the checkbox.
The Warehouse can also be set to only work for certain stores or customer roles via the two settings below if required.
 |
Further information
Jim2Commerce Quick Reference Guides
Jim2Commerce Contact Us Maps Setup
Jim2Commerce Content Management
Jim2Commerce Customer Specific Catalogues
Jim2Commerce Internal User Setup Impersonation
Jim2Commerce Linked Parent Child Portal Setup
Jim2Commerce Product Specifications Strategy
Jim2Commerce Ship Address Management
Jim2Commerce Stock – Attachments
Jim2Commerce Stock – Embroidery Setup

