
Card file lists allow you to access customer, vendor, user, ship and personal card files. By default, lists are named List1, List2, etc. however, you can give your lists a name that clearly shows what you're searching for, or what the list is displaying. This helps the user if they have multiple lists running at the same time.
 |
The CardFile List can collate information from your card records in real time for cross reference, and also use archived data. Jim2 allows searches by any combination of card file type and their active/inactive status by ticking the relevant boxes. |
A simple example of how powerful the list is: select Contact Type Mobile, then enter a mobile number in the Contact Type Value. Run the list and the cardfile containing that mobile number will appear in the list.

There are two different styles of card file list:
▪List (showing the fields and tick boxes in the header).
▪Advanced List (tab on the footer), which adds the fields highlighted below.
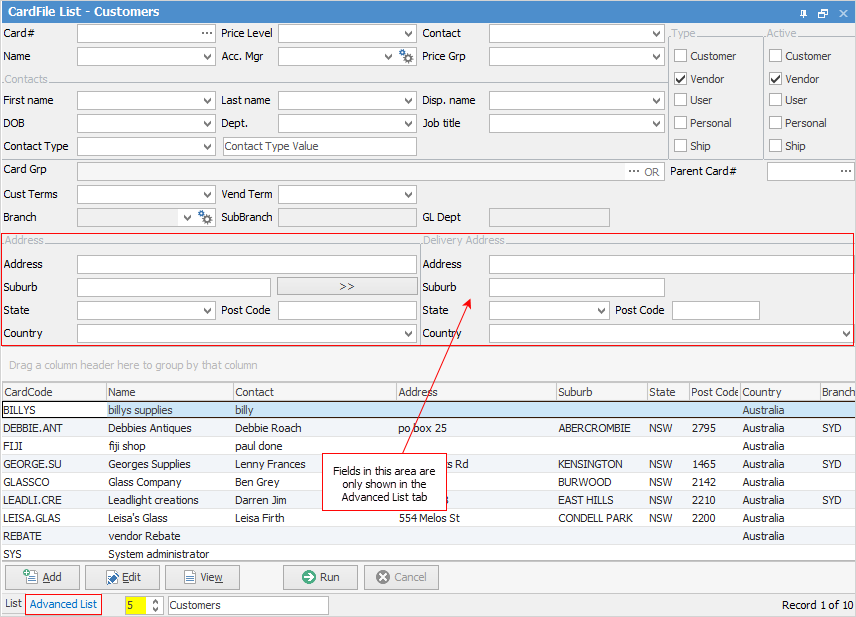
The List tab with its fields and tick boxes is the default view. The Advanced List tab provides you with several more fields to search on. Within this screen you can enter data into the following fields in any combination, then click Run to generate a card file list.
Area |
Field |
Explanation |
CardFile (fields) |
Card# |
Customer card code. This will bring up only the customer with that card code in your list. |
Price Level |
Card file price level. This will bring up a list of customers that only have this price level chosen here. |
|
Contact |
Card file(s) which have the contact name you enter here. |
|
Name |
Card file(s) with the name (user) you enter here. |
|
Acc. Mgr |
Card file(s) with the account manager you enter here. |
|
Price Group |
Price Groups are for exceptions. For example, this customer has retail pricing on machines, but has wholesale pricing for toners. |
|
Type |
Customer |
Tick this box to show customers only in the list. |
Vendors |
Tick this box to show vendors only in the list. |
|
User |
Tick this box to show all Jim2 users within your company, |
|
Personal |
Tick this box for personal card files, ie. a doctor, etc. |
|
Ship |
Tick this box to show all Ship card files – shipping addresses of companies, ie. the physical delivery address of the Ship company is different to what's on their parent card file. |
|
Parent Card# |
Click on the ellipsis [...] to select the parent card if you have ticked Ship. |
|
|
Ticked |
Search only for a card file type that's active. |
|
Unticked |
Search only for a card file type that's inactive. |
|
Either |
Search for a card file type that's either active or inactive. |


Area of the Form |
Field |
Explanation/Purpose |
Contacts |
First Name |
Card file(s) containing a contact with the entered first name. |
Last Name |
Card file(s) containing a contact with the entered last name. |
|
Disp. Name |
Card file(s) containing a contact with the entered display name. |
|
DOB |
Enter the birth date of the contact you are searching for. |
|
Department |
Card file(s) containing a contact with the entered department. |
|
Job Title |
Card file(s) containing a contact with the entered job title. |
|
Contact Type |
Contact Type |
Enter the contact type (phone, email, etc.) for searching. |
Contact Type Value |
Card file(s) containing a contact with the entered values (phone number, email address, etc.). |
|
Groups |
Card Grp |
Returns card file(s) within the selected group or groups. See |
Customer Terms |
Cust Terms |
Card file(s) with the customer terms entered in this field. |
Vendor Terms |
Vend Terms |
Card file(s) with the vendor terms entered in this field. |
Branch, SubBranch and GL Dept (optional) |
Branch |
Card file(s) with this branch name (only if your business uses branches). |
SubBranch |
Card file(s) with this sub-branch name (only if your business uses sub-branches). |
|
GL Dept |
Card file(s) with this GL department name (only if your business uses GL departments). |
 below for more information on the use of this field.
|
On the right-hand side of the Card Grp selection within the list you will notice the word OR. If you click this, it will change to &. This relates to how you want to use groups within your search, if you want to select two groups and find things that are in both groups, use the & option. If you want to search two groups and find anything that is in either one of those groups, use the OR option. Double clicking on the words Card Grp at the beginning of the Card Grp field will turn the field green to indicate that group selection is inverted. For example, select cards that are not in these groups. |
The Advanced List will allow you to search by the following criteria, in combination with any of the fields above:
Area of the Form |
Field |
Explanation/Purpose |
Address |
Address |
Card file(s) with this entered address. |
Suburb |
Card file(s) with this entered suburb. |
|
State |
Card file(s) with this entered state. |
|
Postcode |
Card file(s) with this entered postcode. |
|
Country |
Card file(s) with this entered country. |
|
Delivery Address |
Address |
Card file(s) with this entered delivery address. |
Suburb |
Card file(s) with this entered delivery suburb. |
|
State |
Card file(s) with this entered delivery state. |
|
Postcode |
Card file(s) with this entered delivery postcode. |
|
Country |
Card file(s) with this entered delivery country. |
Using the above information fields, Jim2 produces a list in a format that can be sorted by dragging the column header of the list to the top of the list results table.
To view or edit any of the card files within the list, simply double click, or use your F2 function key on any of the fields relating to the card file that you want to display. There are also additional buttons at the bottom of this form, as explained below:
Button |
Purpose |
 |
Use this to add a new card file. |
 |
Use this to edit the currently highlighted card file in the list. |
 |
Use this to view the currently highlighted card file in the list. |
 |
This will run the list using any filters you have selected. |
 |
This will close the list. |
 |
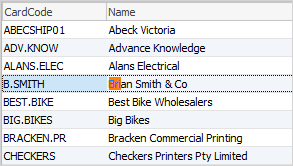
To run a quick search through the list that you've created, place the cursor in the relevant column and begin to type the word you are looking for. The first entry that qualifies will be highlighted, eg. typing Bri in the Name column will locate Brian, if that is the first relevant name. Using Ctrl+Down Arrow will take you to the next match in the list.
You can also right click in the grid and select Show Find Panel, where you can enter search terms (see the table below for more information).
 |
|
The card file list allows you to add multiple card files to both Non Report and Region groups via right clicking in the grid. See Adding CardFiles to Groups for full details. |
|
When viewing a card file from a list select the arrow in the quick access toolbar for the next/previous card file in that list:
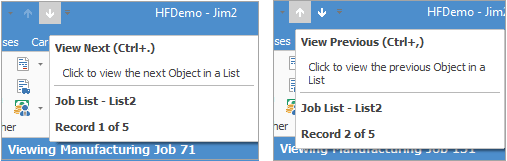
Shortcut Keys:
Ctrl+. moves to the next object in the list Ctrl+, moves to the previous object in the list |
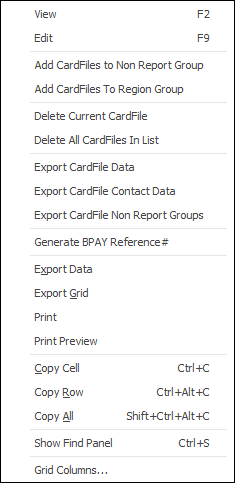
Right-Click Options in the CardFile List
Right Click Option |
Function |
||
|---|---|---|---|
View |
View the highlighted card file. |
||
Edit |
Edit the highlighted card file. |
||
Add CardFiles to Non Report Group |
Adds all card files in the list to the non report group you select. |
||
Add CardFiles to Region Group |
Adds all card files in the list to the region group you select. |
||
Delete Current CardFile |
Deletes the highlighted card file. |
||
Delete All CardFiles in List |
Deletes all card files in the list. |
||
Export CardFile Data |
Exports the list to a spreadsheet. |
||
Export CardFile Contact Data |
Exports the list card file name and contact details to a spreadsheet . |
||
Export CardFile Non Report Groups |
Exports card code, name and non report group information to a spreadsheet. |
||
Generate BPAY Reference# |
Generates BPAY reference numbers for all card files in the list. Only works on a Customer card file list. |
||
Export Data |
Exports data from the grid to a spreadsheet file. |
||
Export Grid |
Exports the grid to a spreadsheet. This is particularly useful if your grid has more than one header row, as it will export all header rows. |
||
Print the list. |
|||
Print Preview |
Preview the list to be printed. |
||
Copy Cell |
Copy the cell you have clicked on. |
||
Copy Row |
Copy the entire row you have clicked on. |
||
Copy All |
Copy all, which can then be pasted into a spreadsheet |
||
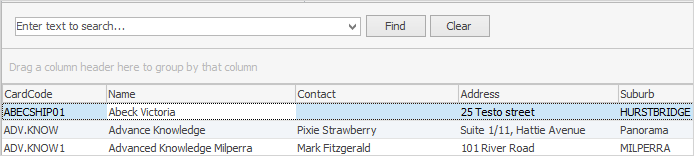
Show Find panel |
Opens the Find panel:

|
||
Grid Columns... |
Allows you to select more columns to add to the grid. |
Right Click Options in the Nav Tree
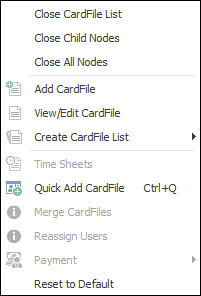
After the top 3 (which are self explanatory), these options mirror what is in the ribbon in the CardFiles tab, except for the last tab, which will reset all tabs to the default.
|
Payment within this right-click list becomes clickable when you have a single card file open. This is a very quick way to bring up the Payment or Refund screen for that client/vendor instead of having to go to Debtors or Creditors..
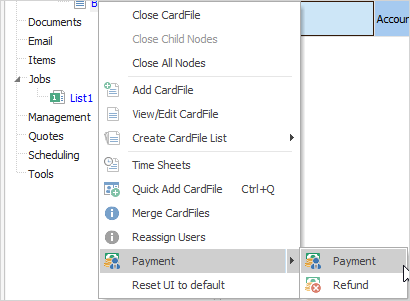
Payment only allows you to take prepayments, and Refund only allows you to refund a prepayment or return. |
Further information: