Hardware installation (inline)
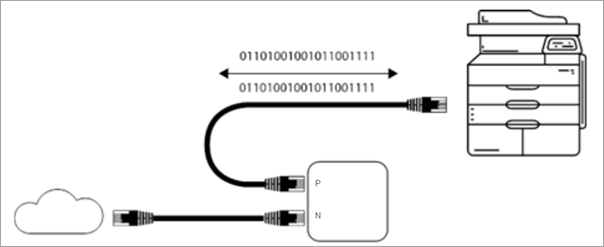
1.Insert one end of the supplied ethernet cable into the 'P' port on the mpsGOtm unit, and the other end into the customer's device.
2.Plug the customer provided ethernet cable from the wall data port into the 'N' port on the mpsGOtm unit.
3.Plug the micro USB side of the provided USB power cord into the port on the mpsGOtm unit and the USB-A end into the customer's device, or use the supplied micro USB power block.
 |
Not: Installation of the mpsGOtm unit can be completed anywhere on the network, and does not need to be installed inline with the device. |
For larger sites with multiple devices, it is recommended to install the mpsGOtm unit in a server cabinet. Ensure a labelled sticker is affixed to the appliance, including your asset number and contact details.
Getting Started in EKM
Create a new monitor for the mpsGOtm devices in the Happen EKM Portal.
1.Log in to the Happen EKM Portal and navigate to the customer.
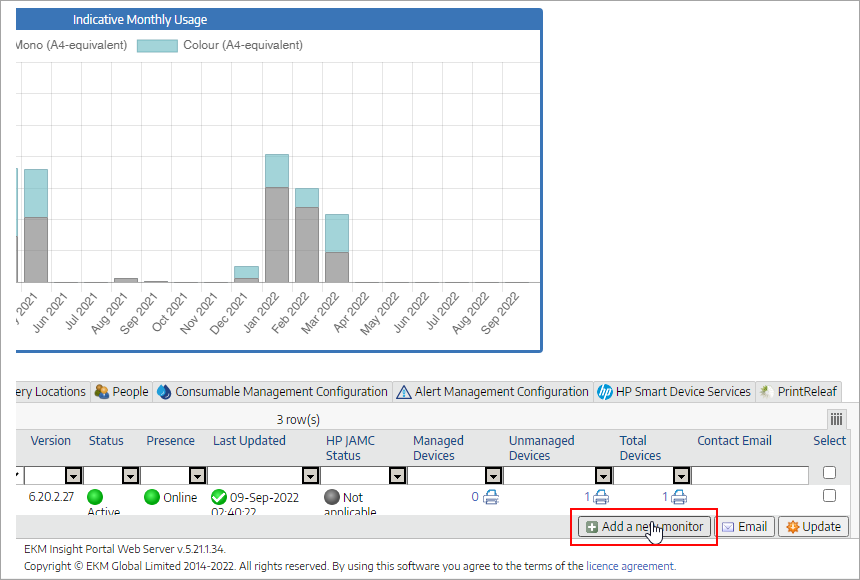
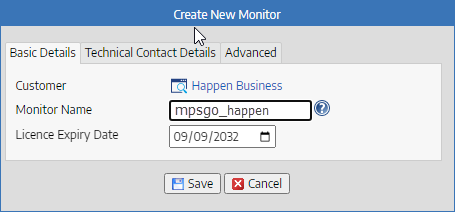
2.Add a new monitor using standard conventions.
 |
Note: Do not use upper case in the Monitor Name – it must be all lower case. |
2.Record the Licence Key for the new monitor to use for configuring the mpsGOtm unit.
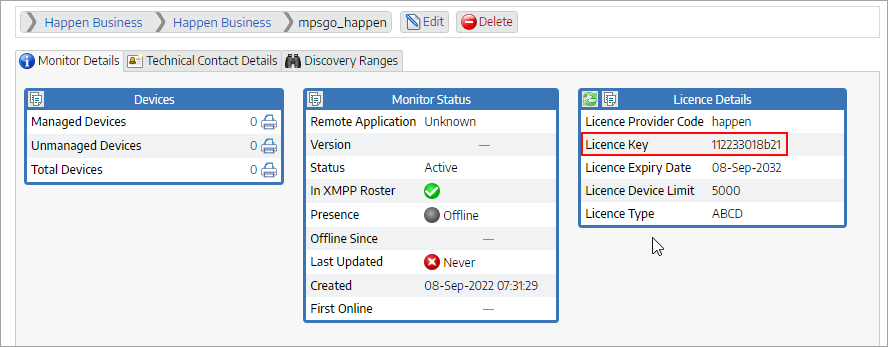
If the discovery ranges for the network are known, they can be added at this point.
mpsGotm Getting Started
Configure the mpsGOtm unit.
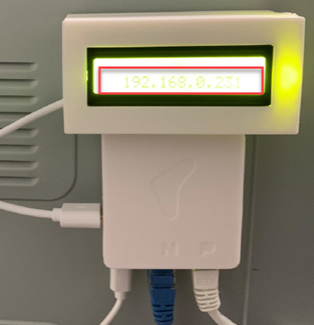
1.Power on the mpsGOtm unit and connect to a network. Plug in the USB Technician Key and note the current IP address assigned to the mpsGOtm unit.
 |
Note: The USB Technician Key must remain connected to the mpsGOtm unit to enable the programming process.When the USB Technician key is removed, the mpsGOtm unit will be locked, and is not accessible for further programming. |
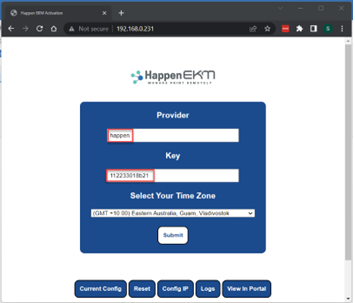
2.From a computer connected to the same network as the unlocked mpsGO unit, navigate to the IP address from a browser. When the mpsGO unit appears as a webpage in your browser, enter the Provider code happen and the unique licence key noted from the monitor setup above. Confirm the time zone and select Submit.
 |
Note: If a Discovery Range is not applied when the monitor was created, log back into the Happen EKM Portal and add as applicable now. As per all other Happen EKM DCA to Monitor connections, allow time for the mpsGO unit to search the network and report found devices to the Happen EKM Portal. |
Further information