
The fields and tick boxes, and their use, are explained below.
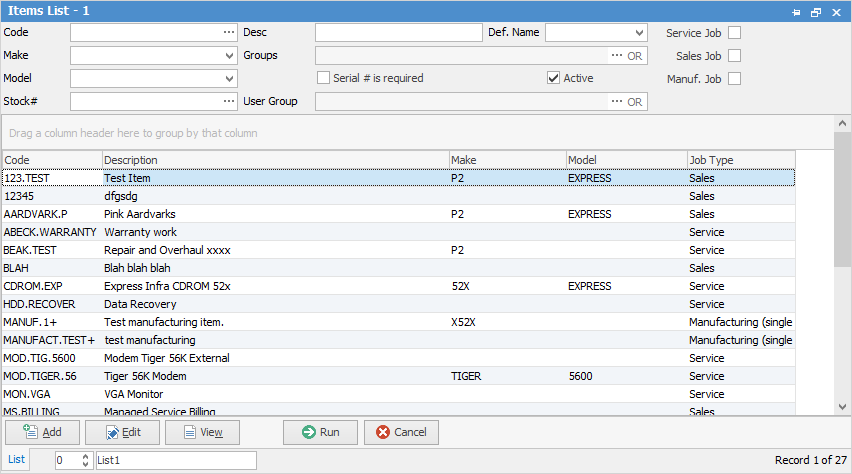
Sorting, searching and grouping are all available as per other lists in Jim2. Click on the column header in the grid you wish to sort, then drag it to the Group By area to group.

Field |
Explanation |
|---|---|
Code |
Enter the code (or partial code) to display only those Items which match that criteria. |
Description |
Enter a description (or partial description) to find those Items which match that criteria. |
Make |
Shows only Items with this make. |
Model |
Shows only Items with this model. |
Stock# |
Select a stock code if you wish to filter by one particular piece of stock. Once a code is entered, hover over Stock# and it will turn into a hyperlink, allowing you to go directly to that stock record. |
Groups |
Enter a report group or groups to display only the Items which belong to those groups. |
User Groups |
Enter User Groups for this Item. |
Def. Name |
Select a name to display only those Items which have this Default (user) Name on them. |
Serial# is required |
Tick this box to display those Items which have the Serial# is required box ticked on their Item records. |
Active |
By default, only active Items are shown. Since you can't delete Items (instead you must mark them as inactive), untick this box to also include inactive Items in your search results. |
Service Job. Sales Job. Manuf. Job. |
Ticking one or more of these boxes will include service and/or sales and/or manufacturing job Items in the search results. Ticking all three of these boxes returns the same results as ticking none. |
To view or edit any of the Items within the list, simply double click, or use the F2 function key on any of the fields relating to the Item that you want to display. There are also additional buttons at the bottom of this form, as explained below:
Button |
Function |
|---|---|
 |
Click to open an Adding New Item screen. |
 |
Click to edit the currently highlighted Item. |
 |
Click to view the currently highlighted Item. |
 |
Runs the query and displays an Items list as filtered by data entered into the fields and tick boxes. |
 |
Closes the Items List screen. |
Right-Click Options in the Items List
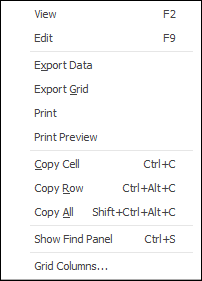
Right Click Option |
Function |
||
|---|---|---|---|
View |
View the highlighted Item. |
||
Edit |
Edit the highlighted Item. |
||
Export Data |
Exports data from the grid to a spreadsheet file. |
||
Export Grid |
Exports the grid to a spreadsheet. This is particularly useful if your grid has more than one header row, as it will export all header rows. |
||
Print the list. |
|||
Print Preview |
Preview the list to be printed. |
||
Copy Cell |
Copy the cell you have highlighted. |
||
Copy Row |
Copy the entire row you have highlighted. |
||
Copy All |
Copy all, which can then be pasted into a spreadsheet |
||
Show Find panel |
Opens the Find panel: 
|
||
Grid Columns... |
Allows you to select more columns to add to the grid. |

Further information: