
To set up your MPS Connector, follow these steps:
1.Create a Jes instance for the appropriate database (assuming there isn't one already available).
2.Start the Jim2 Configuration Manager, highlight the appropriate Jes instance, and choose the Action > Configure menu.

3.Highlight the MPS Connectors module. If the module is not there, click Add and select Happen.JesM_Photocopier (MPS Connectors) from the list.
4.Once the MPS Connector module is highlighted, check that it is enabled. If it is not enabled, click Enable. Configure the PollInterval value. This specifies in seconds how long between checks for files. This includes retrieving any emails that contain files for processing.
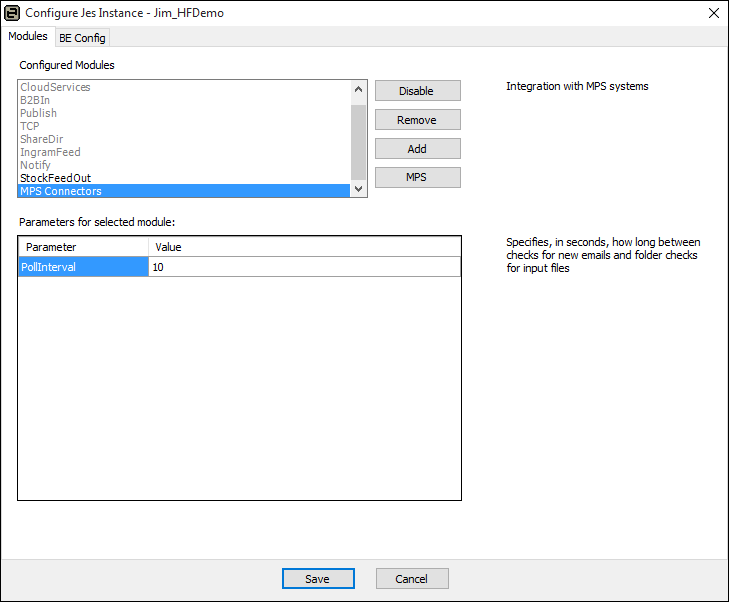
5.Click MPS to open the Configure MPS Systems screen.
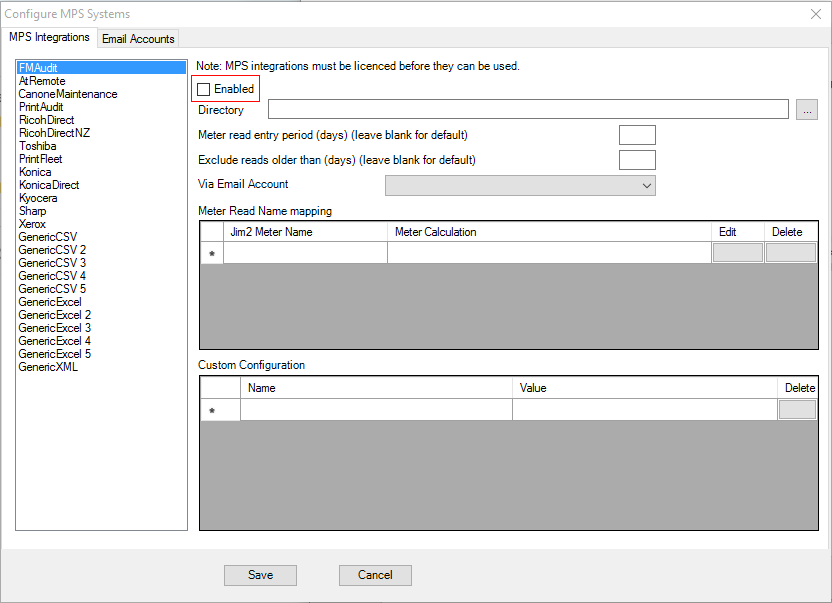
6.To configure an MPS feed, highlight it in the list of supported types.
7.Ensure that the Enabled box is ticked.
8.Enter a path that exists on your server into the Directory field. Attachments that are extracted from any emails will be saved to this folder – any file with the correct extension (either .csv or .xml).
9.Set up the Meter Read Name mapping. The Jim2 Meter Name should match the name in the machine's Meter Setup tab.
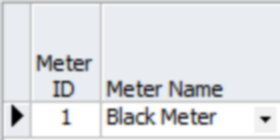
If you named your Jim 2 black meter My Black Meter and your Jim 2 colour meter My Colour Meter, the default setup for various MPS connectors is as follows:
MPS Integrations |
Jim2 Meter Name |
Machine Meter Name |
FM Audit |
My Black Meter |
PageCountMono |
FM Audit |
My Colour Meter |
PageCountColor |
AtRemote |
My Black Meter |
Black |
AtRemote |
My Colour Meter |
Color |
Canon eMaintenance |
My Black Meter |
Calculation |
Canon eMaintenance |
My Colour Meter |
Calculation |
GenericXML |
My Black Meter |
Defined by CountName in document |
GenericXML |
My Colour Meter |
Defined by CountName in document |
Print Audit |
My Black Meter |
Mono Count |
Print Audit |
My Colour Meter |
Color Count |
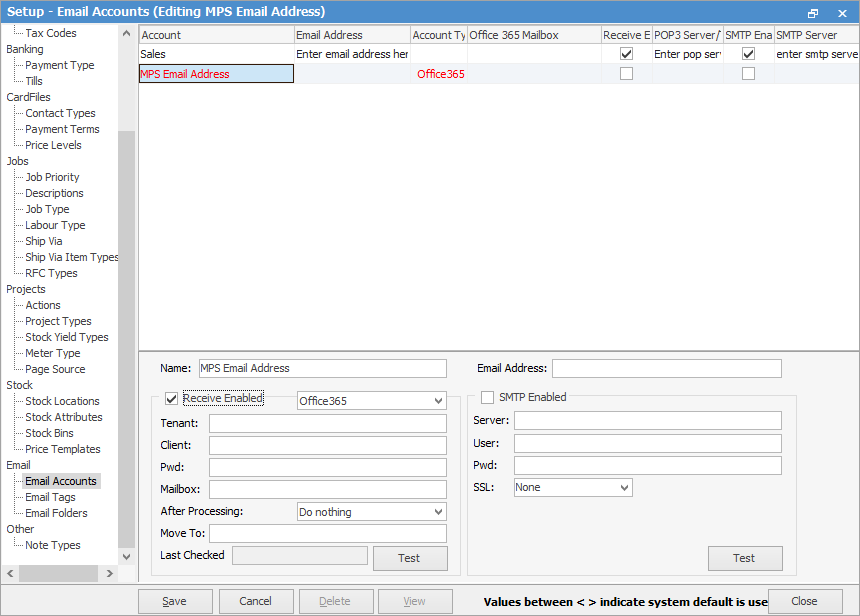
10.If desired, select an email account from the Via Email Account list. To set up an email account go to the Email Accounts tab and enter appropriate account details

11. Save the changes, and restart Jes for the changes to become effective.
Customisable CSV, XLS/XLSX MPS Connectors
You can configure the MPS Connector specifying how the connector finds particular columns required in the file. The location of columns can be specified either by index or by heading, and allows Jim2 to conform to your data, instead of the other way around.
Add an email rule to process MPS Connectors with O365 Settings.
First, add the email address to Jim2 following these instructions. Ensure you have selected Office 365 and the email address is part of your Microsoft Graph Authenticator
Then create a new Jim2 Email Rule to process these emails.
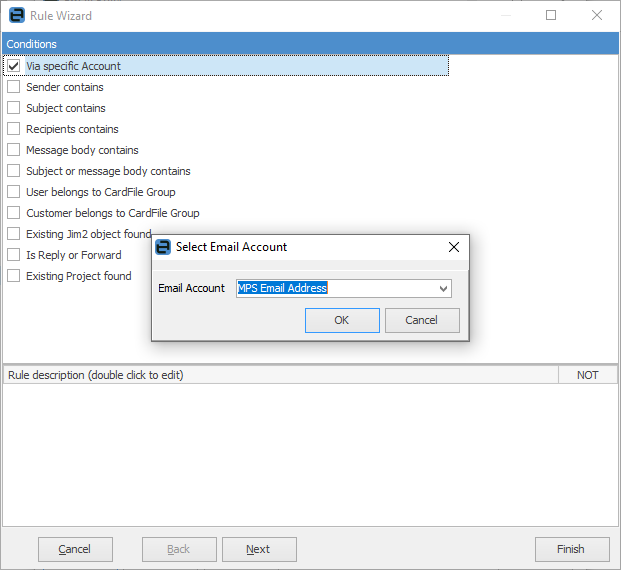
Tick Via Specific Account and select the email address that was created above.
 |
Note : If you have multiple MPS email connectors going to the same email address, you will need to create a rule for each, but also use Subject Contains or Recipient Contains, and ensure the subject or recipient matches. This is to identify which MPS Connector is used to process the email. |
Click Next and select Process With MPS Connector in the drop down box. Choose which Connector it needs to process with.
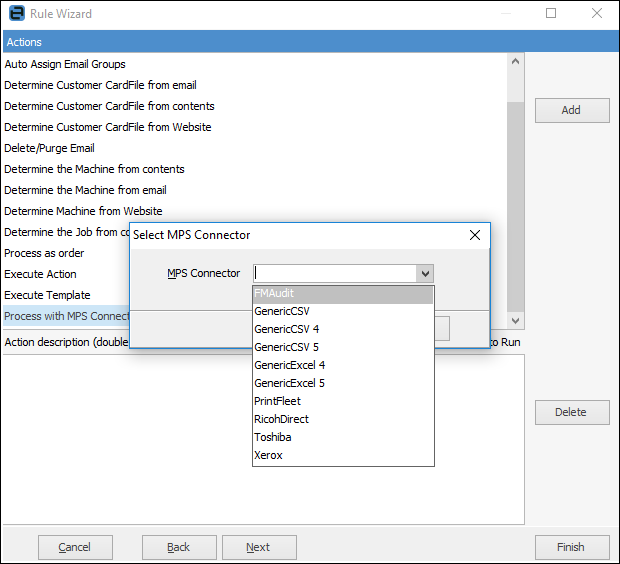
Click Finish.
Further information:
|