
 |
You cannot invoice from a live job list. |
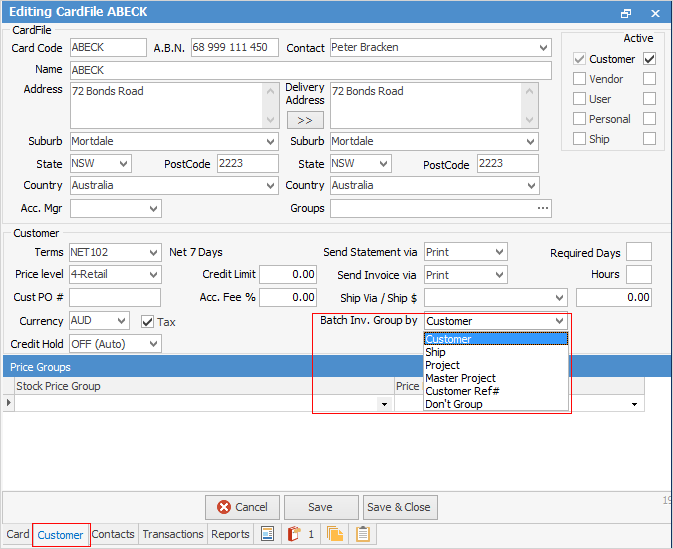
1.Open the customer card file and select the Customer tab at the bottom of the card file. In the Batch Inv. Group by, select Customer.
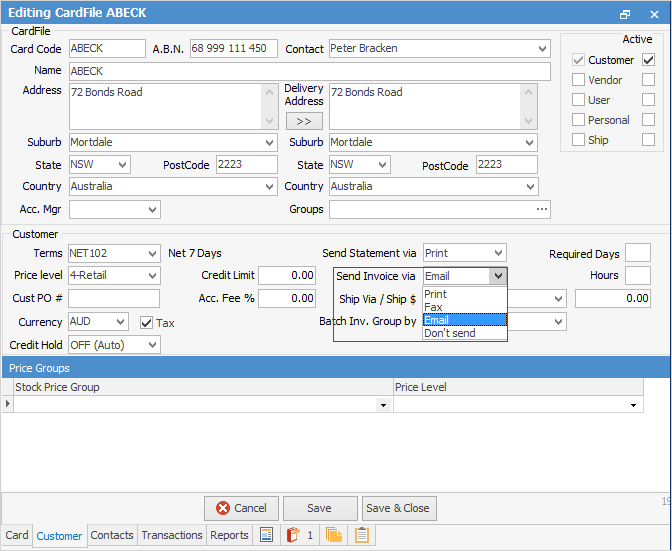
2.Select the way you wish to send your invoice.
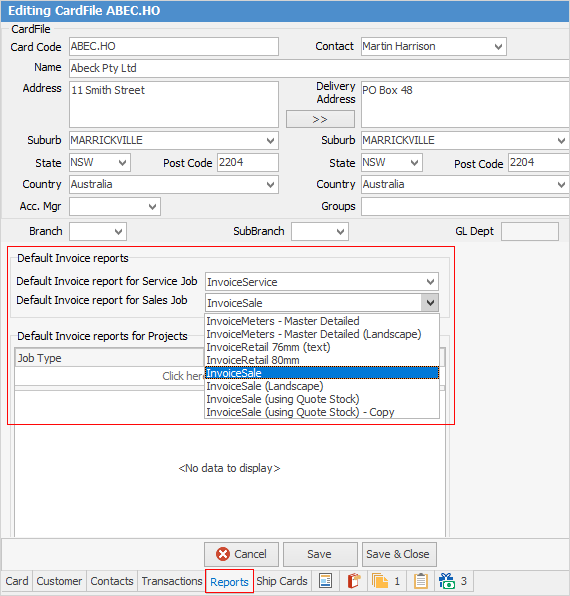
3.Go to the Reports tab, and ensure you have the selected the correct invoice report. This may be set to <Use Default>, so it's best to check what you have set in Tools > Options > Job > Invoice. Jim2 determines which invoice format to use first via the customer card file, and if it is set to <Use Default>, it will then fall back to what you have selected in Options.
The job list can be used to group jobs belonging to one or several customers, and produce one invoice per customer containing many jobs.
This is particularly useful if:
•You process high volumes of jobs for those customers and don't want to have to produce individual invoices for each job – you'd rather produce one invoice containing all their finished jobs.
•You need to invoice jobs containing a specific Cust Ref# or Item# together so all jobs can be included on the one invoice.
 |
If you wish to print physical copies of invoices, you need to enable Print Invoice after invoicing a job in Tools > Options > Job > Invoice.
Email will send invoice and print 1 copy if Printer 2 is set up to print 1. If not, Email will send only. |
Invoice Multiple Jobs
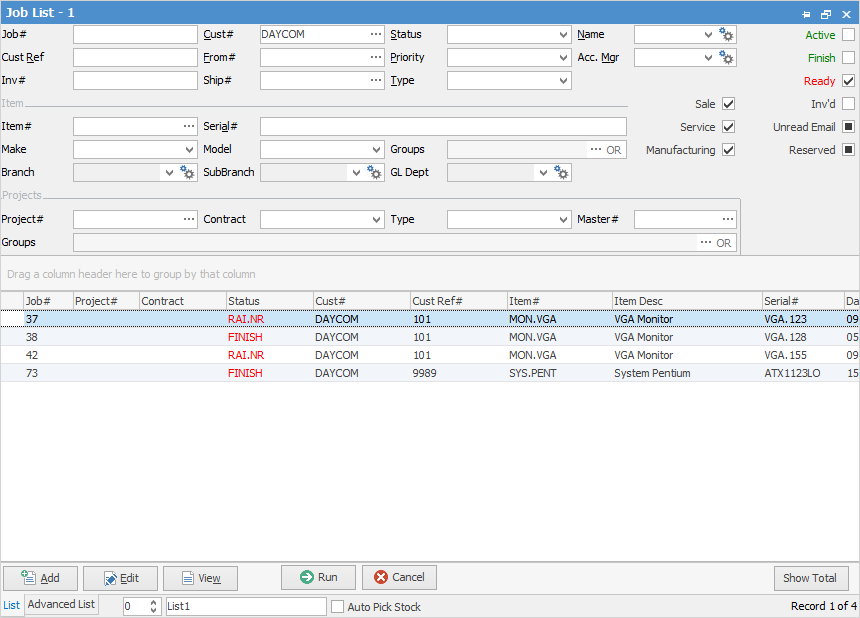
1.To invoice multiple jobs for one customer (or several customers), create a list. To filter your search for a single customer – enter the customer's code in the Cust# field, choose any other relevant search criteria that meets your invoice requirement (for example, Cust Ref#) and untick the Active and Finish boxes in the job list, leaving Ready ticked. For multiple customers, simply untick the Active and Finish boxes in the job list, choose any other relevant search criteria, but leave the Cust# field blank.
2.The job list can help you filter jobs that meet the above criteria. Choose the search fields that meet that need.
|
You cannot invoice a list of one customer's jobs where the SubBranch or GL Department values are different, unless you have enabled this in Options General – Branches. Tax type must be the same as well, ie. only Tax Paid Up or Tax Paid Down. |
3.Click Run. This search will show any current jobs that are ready to be invoiced for that customer (or customers), and the invoicing icon will be enabled.

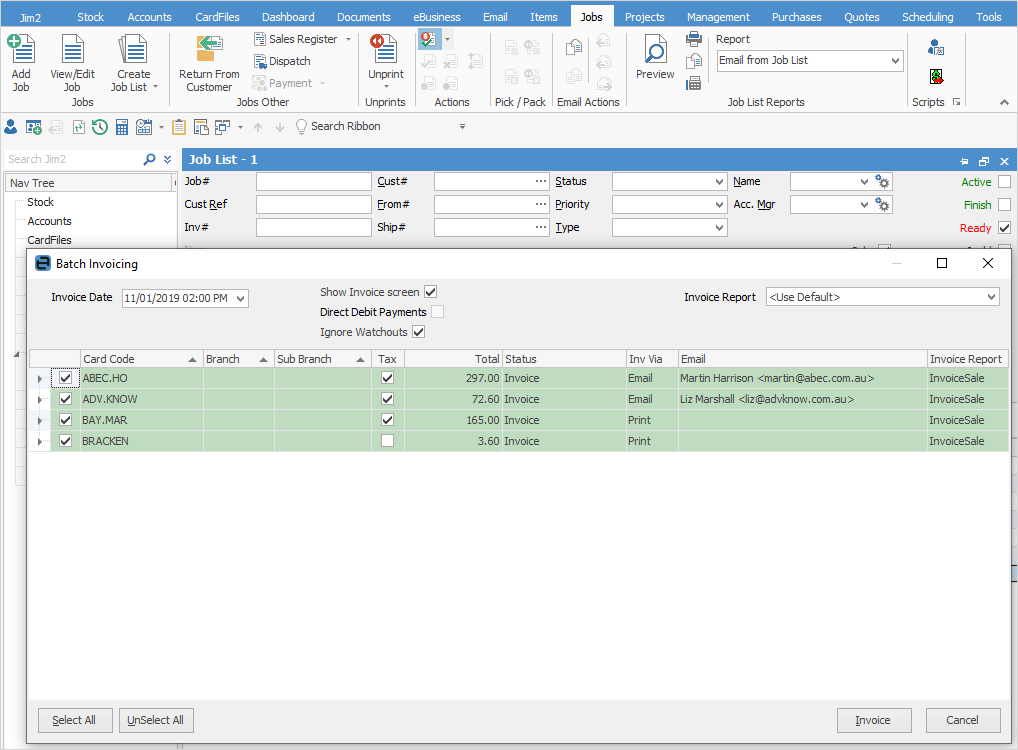
4.Select the Invoice Job icon and it will bring up the invoicing details for an individual customer, or the Batch Invoicing screen for a list of customers.
The Invoice form will now be updated with default invoice, customer and shipping details.
 |
On the Payment Details screen of the Invoice screen, function keys F4 through to F10 will allow you to select a payment method.
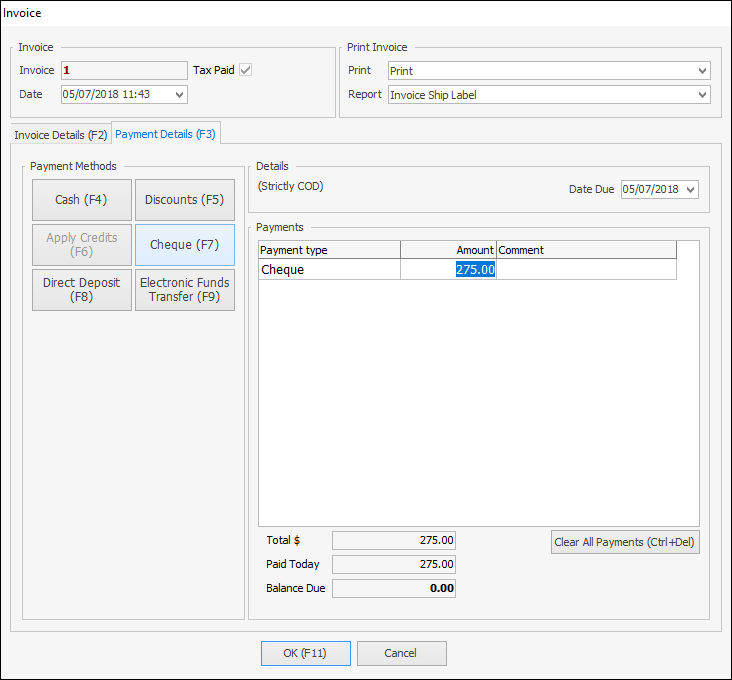
Note the F11 key allows you to complete and OK the invoice. |
|
With batch invoicing, you can choose not to invoice a particular customer from the list by unticking that box prior to selecting the Invoice icon.
 |
5.Check all the details are correct and click OK (for single customer) or Invoice (for multiple customers).
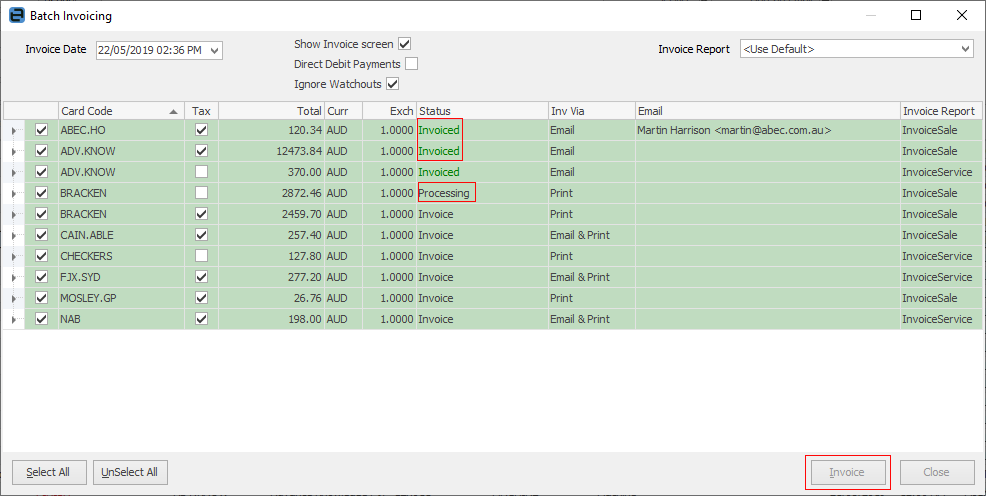
The Batch Invoicing screen will show that the customer has been invoiced at the completion of invoicing.
|
You cannot batch invoice COD customers. |
|
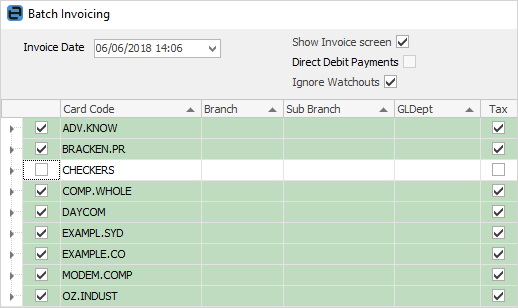
You can backdate batch invoices simply by changing the date when invoicing:
 |
The Direct Debit tick box is not selectable if a direct debit debtor payment type Banking in Options.
Further information: