
The expenses grid of an expense order is designed to record and calculate the quantity and cost price of all the expenses attached to the cost of stock within a purchase which are not known at the time of receiving the stock.
This is done by entering the PO number in the PO# field of the expenses grid of a newly created expense order. When adding the PO number to the expense order, this will automatically allocate the expense to the stock in the purchase order (ie. increase the COGS on the PO) once the status of the expense order is Finish.
You can enter both expense orders and negative expense orders into Jim2, and both of these types can be applied to purchase orders. If you have any expense order which has a positive and negative value, and they balance out to $0 value, no creditor entry will be created.
Create an Expense order as per the instructions here. When you get to the expense grid, please follow the instructions below:
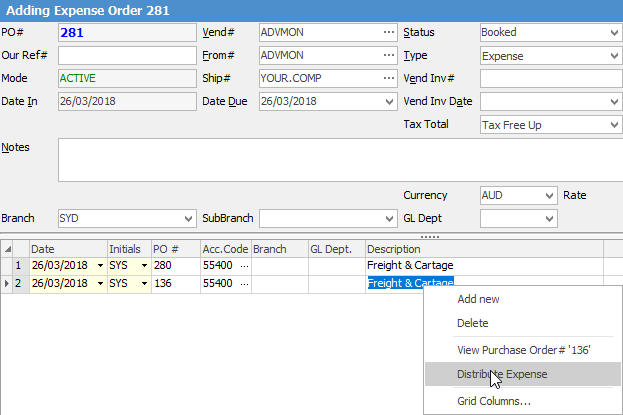
1.Enter the purchase order number in the first field. You can go direct to the linked purchase order by right clicking and selecting View Purchase Order#.

If you have expenses attached to the cost of stock within a purchase, which are not known at the time of receiving the stock, you can add it to a purchase order by entering the PO number in the PO # field of the expense grid. When adding the PO number to the expense order, this will automatically allocate the expense to the stock in the purchase order (ie. increase the COGS on the PO) once the status of the expense order is Finish. You can expand or reduce the number of fields viewed in the expense grid by selecting the arrowhead  on the top left-hand corner of the expense grid.
3.To add expenses to a purchase order, move to the Acc.Code field of the expense grid and select expenses in one of the following ways:
▪Select the ellipsis [...], which will bring up a drop-down list, then select the GL account.
▪Start to type the in the field – Jim2 intuitive type will begin to pre-empt your choice of GL Accounts.
Once you have selected the Expense GL Account, the GL Account Description will show.
4.Enter the quantity of the expense ordered from the vendor. This will be used when calculating the totals.
|
If you are entering a negative expense order, the quantity is entered as a positive number, the dollar values are entered as negative values. |

5.Enter either the Tax Free Price or the Tax Paid Price of the expense. If you are entering a negative expense order you will need to enter these dollar values as negatives, as per above.
6.Now the Tax Code field may have already been filled from either the default on that general ledger account or the vendor selected is Tax Free, in which case the Tax Free code (specified in Purchase Options) will be used.
|
Importing goods requires a Lump Sum GST Value to be entered – usually a period of time after you have actually received the stock relating to the importing of the goods. In this case the original PO would be entered using the X Tax Code (exclude on GST/BAS reports). When you receive the paperwork relating to this Lump Sum GST, it will need to be added through an expense order using the GST Liability GL Accounts – You will not be able to apply this expense order to a PO. When selecting either of these tax accounts, you will only have the option of the following Tax Codes:
Y = Lump Sum Other Acquisition G11 Z = Lump Sum Capital Acquisition G10 X = Exclude from GST Reports |

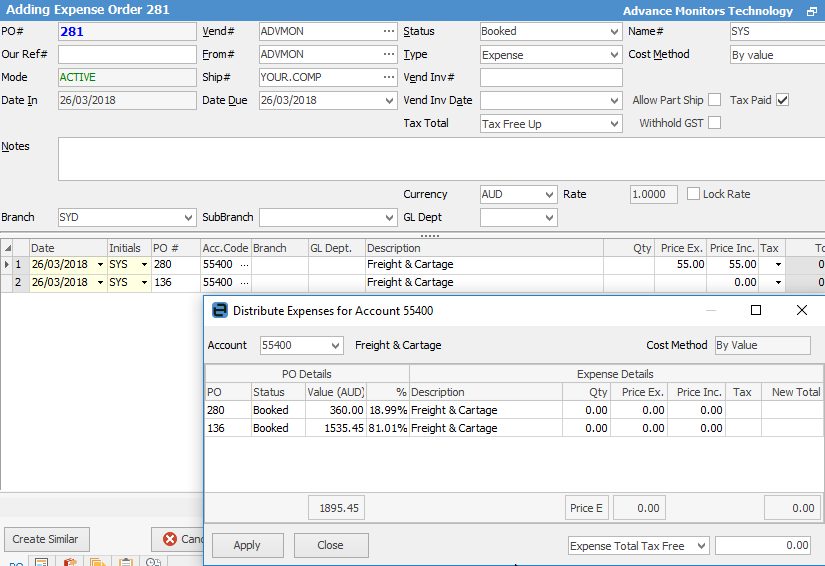
Distribute Costs
Following on from the above, you have the ability to distribute expenses on individual lines of the Expense order. Once you have populated the grid with PO numbers and account code (in this case Freight), simply right click within the Description field and select Distribute Expense.
A screen will pop up showing the lines within the grid, and the percentage of the cost being apportioned. (In this case (freight), the percentage is based on what you have set up in Tools > Options > Purchases > Default Freight split method. You can apply to all of lines with the same Acc.Code. you can change the Acc.Code within the pop-up, allowing you to apply to more than one account.
You can see any linked expenses from the Expenses tab at the bottom of a purchase order.
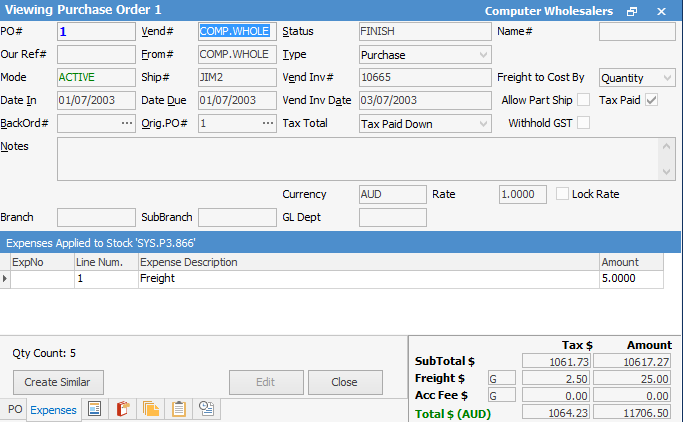
The linked expense is displayed at a stock line level where a quantity of stock has been received – if 0 has been received, there is no linked expense.
Select a line of stock, then look at the Expenses tab to view the linked expense per unit of stock, eg. if the quantity received is 1 unit, the linked expense shows the expense per 1 unit. This expense also updates the COGS field in the stock line on the PO.
For further information on transactions relating to imported goods, refer to the section on Handling Imported Goods and Import Charges.
Further information: