
Jim2 can create ABA files to upload into online banking programs when paying creditors, but prior to entering creditor payments using this functionality please refer to Banking > Electronic Payments for further information on the required setups.
There are two methods of entering payments for creditors.
1.Method one requires you to enter an amount into the Amount field, then allocate the payment to multiple vendor invoices by way of the Paid Now field for each invoice..
2.Method two allows you to double click the Paid Now field for purchase orders/vendor invoices and Jim2 will calculate the total in the Amount field.
 |
You will see some letters underlined in the field names within the header, eg. Type. Using Alt+ the underlined letter will jump you to the field beside that heading. |
 |
if the Payment Approved tick box is not ticked against an invoice, you cannot apply payments or credits to that invoice. There is a default setting in Tools > Options > Purchase where you can select that Payments are Approved by default.
This default setting largely depends on the workflow in your business as to who is ordering the goods and approving creditor invoices/POs for payment.
If the person finishing the POs (ie. checking them against the vendor invoices prior to finishing) is the person who is responsible for approving the invoices for payment, it makes sense for the default to be set as Approved.
If the responsibility lies with different people, typically the default setting would be for this not to be ticked, so the person paying the creditor would select the invoices that are approved for payment, and only pay those that are approved. |
 |
You cannot add a reference number to a bank ABA file. |
Method One
To enter a payment using the Creditors Payment screen and Payment Method One:
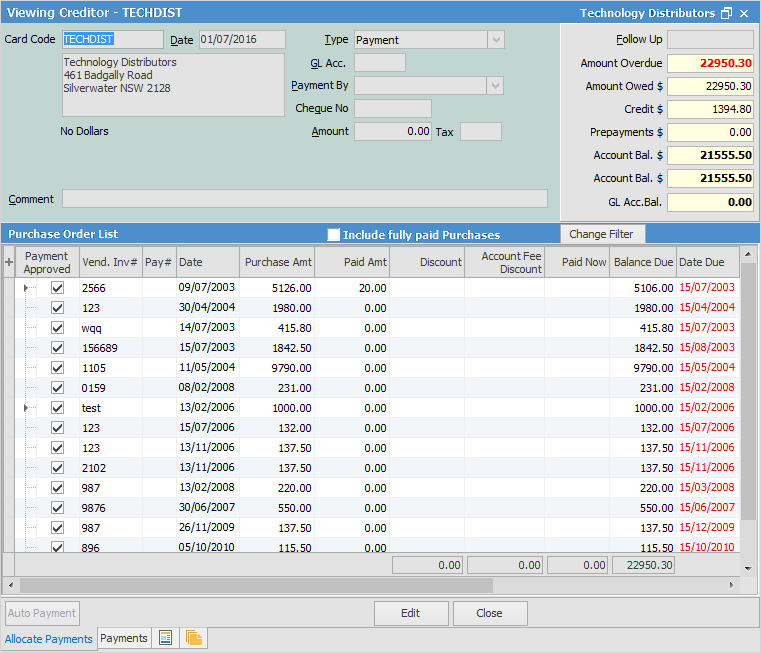
1.Select the creditor that you want to enter the payment for.
2.Click Edit at the bottom of the screen.
3.The Date field will default to today's date and can be changed if required. If you backdate the payment, you will receive the warning message:
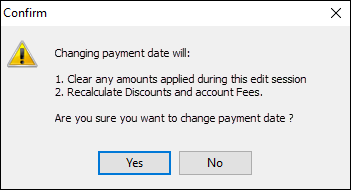
You should check that the payment date you have entered is correct, then click Yes if it is correct.
4.The Type field will default to Payment, and does not need to be changed for this type of entry.
5.The general ledger account will be the default one selected in Banking Options, however you can select a different bank or credit card GL account from the drop-down options if required.
6.Select the Payment By method: cash, cheque, credit card, etc. The Cheque Number field will automatically populate using the GL bank account and the payment type. You can change this if required. If you want to create an ABA file to upload to your online banking, you must ensure that you select the payment method set for Electronic Payments.
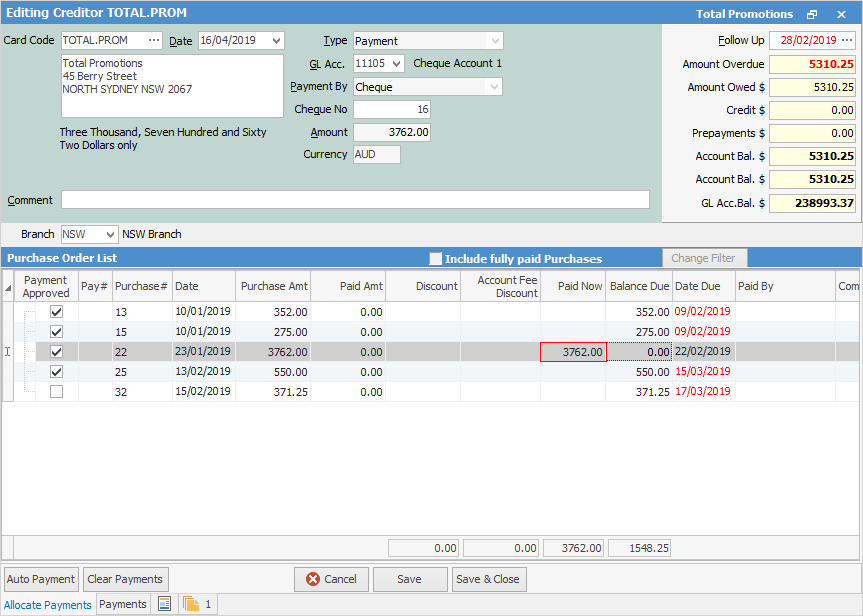
7.Enter the amount of the payment.
8.You can add a comment to this payment if required
9.Now you need to select the method that you want to use to apply the payment. There are three ways:
▪Click on Auto Payment (bottom left of screen) – the payment will be allocated to the oldest invoice first.
Important: You must sort the date column so that the oldest date appears at the top first.
▪Double click the Paid Now column of the invoice that you want to pay with this payment entry, and it will allocate the amount to the selected invoice and any monies left over can then be allocated to other invoices.
▪Alternatively you can select multiple invoices and allocate the amount that you want from that payment to each invoice by typing the value into the Paid Now field.
10.The Clear Payments button will simply clear any allocations made while you are still in Edit mode.
11.Click Save.
Method Two
Entering a Creditors Payment using this method is not all that different from the above entry. Complete steps one to six in the same way as above, then:
1.Instead of entering a value into the Amount field, simply double click on the Paid Now fields of the purchase orders/vendor invoices that you want to pay. This will automatically create a total in the Amount field in the header of this creditor's screen.
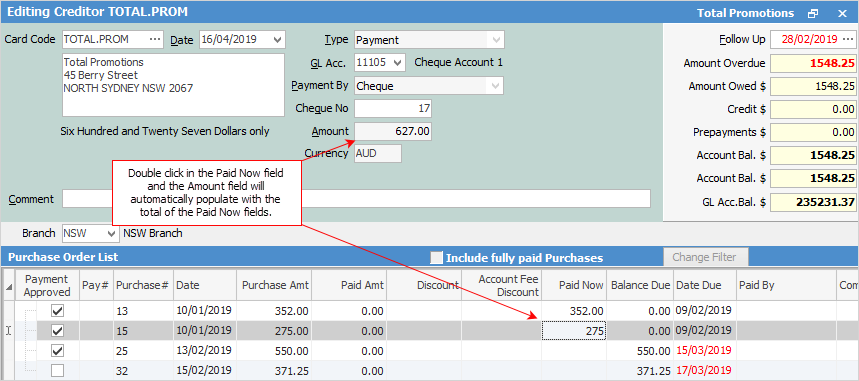
This second method is extremely useful if you are paying a number of vendor invoices by their invoice numbers or date, and therefore are not paying a set amount, but rather, an accumulated amount.
2.You can add a comment if required.
3.Click Save.
If you unprint a purchase which has not been paid, a reversing entry will be shown for that purchase. If you unprint a purchase that has been paid, a reversing entry will be shown for the purchase, and any payments will become credits.
Further information: