
The job is pivotal in defining who, how, when and what work is performed, and at what cost. That work and any related stock used is then charged or invoiced to the customer. In Jim2, an invoice is really only a report – generated using information from fields and grids within the Job form combined with information and calculation methods derived from the card file of that customer and specific Jim2 options and job options you have selected.
Invoice is a Jim2 function, not a status. The invoice indicates the job is about to leave the workflow and return to the customer. To create an invoice, Jim2 will check that a job or a list of jobs are either:
▪At a status of Finish, Return As Is – Not Repaired (RAI.NR) or Return As Is – UnServiceable (RAI.US).
An invoice adds vital accounting information to your company records in terms of stock, profit, debtors and turnover. Jim2 gathers the information from invoices (as well as purchases, returns to vendors, returns from customers and payments) and creates general ledger transactions to update your general ledger, debtors and stock information.
 |
Jim2 manages the issues of recording and reporting GST requirements, and provides accurate and relevant BAS support documents to assist in fulfilling Australian Taxation Office specifications for the tax system. |
1.To invoice a single job it needs to be at a status of Finish (or RAI.NR, RAI.US) and set to Ready. If you try to invoice a job without it being Finish and Ready, Jim2 will pop a reminder to your screen to do so. Select the Invoice Job icon from the ribbon. This icon will only be accessible if the job can be invoiced.

 |
On the Payment Details screen, function keys F4 through to F10 will allow you to select a payment method.
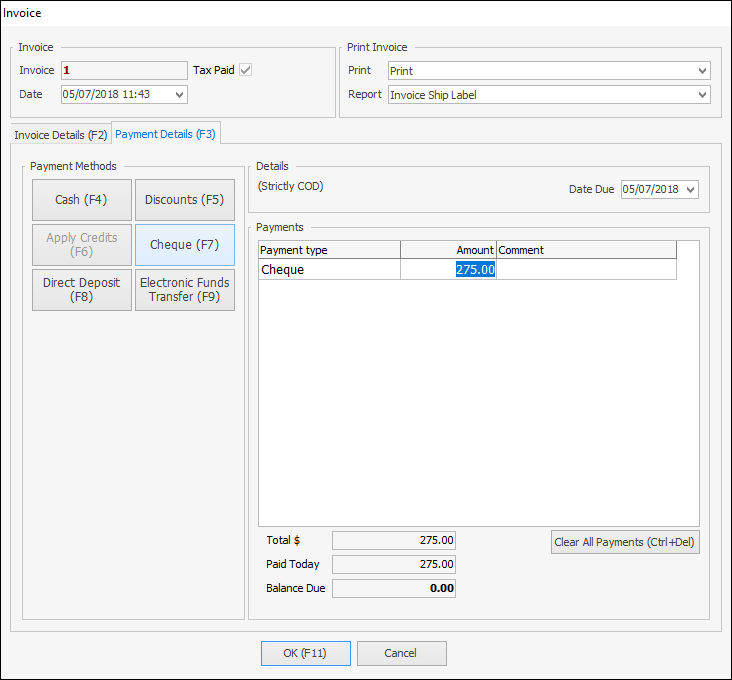
Note the F11 key allows you to complete and OK the invoice. |
The Invoice form will now be updated with invoice, customer and shipping details. However, you may override this default information simply by using the Tab key or mouse to move the cursor to that field, highlight and re-edit. The exception is the Invoice#, Branch, SubBranch, GL Department and the Tax Paid fields, which are not able to be edited as they form part of the secure quality record for that job. Select the Payment Details tab and choose the method of payment.
At this point, you can change the date due to whatever you would like and this will flow through to your debtors listing.
| 2. | Check all the details are correct and click OK or F11. This will generate the invoice report, which will either print immediately or be recorded only, depending on the Job Invoice Option you have set. |
Email will send invoice and print 1 copy if Printer 2 is set up to print 1. If not, Email will send only.
 |
The Branch, SubBranch and GL Department fields will only be displayed if you have selected that you use them in Options. These fields are not editable at the time of invoicing the job – these fields must be selected in the job and will then carry over to the invoice. If the Branch, SubBranch or GL Department on the Invoice screen is incorrect you will need to cancel the invoice, un-ready the job, then edit to change the values. |
Looking back to the original job, The Inv# field in the Job header is now updated with the invoice number. If you click the ellipsis [...] in the Inv# field in the Job header, a Print Invoice Selection Box will appear and you can preview and/or reprint the invoice.
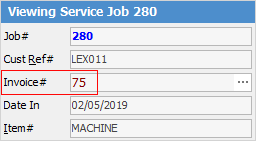
|
You can backdate invoices simply by changing the date when invoicing:
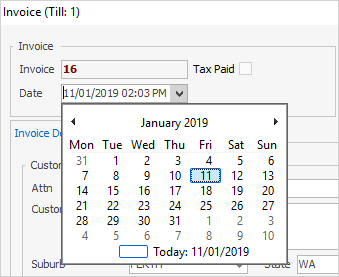 |
 |
If the customer has been set up with terms of COD you will not be able to invoice the job until you receive payment. |
|
If you invoice a job which has a back order quantity on it, after invoicing you will see the following pop-up, where you can select from any/all of these options:
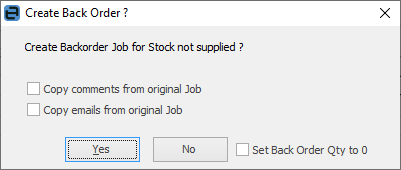 |
Further information: