The following are simple scenarios for warranty stock, and the steps to take. See the example below for more detailed information.
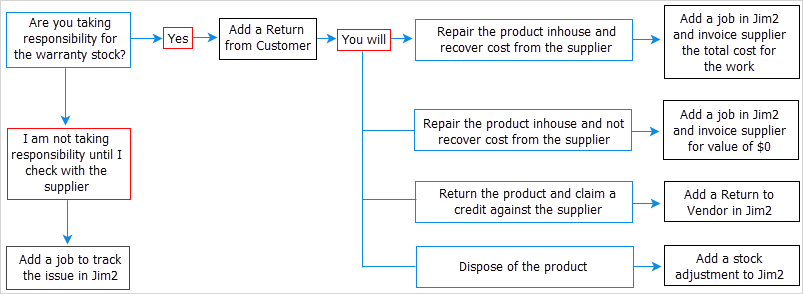
If you are taking responsibility for the warranty
▪Add a Return from Customer.
If you are going to repair the product yourself and recover the cost
▪Add a Return from Customer.
▪Add a job, and invoice the supplier for the work.
If you are going to repair the product yourself and not recover the cost
▪Add a Return from Customer.
▪Add a job, and invoice the supplier for $0.
If you are going to return the product and claim a credit against the supplier
▪Add a Return from Customer.
▪Add a Return to Vendor.
If you are going to dispose of the product
▪Add a Return from Customer.
▪Add a stock adjustment.
If you are not going to take responsibility for the warranty until checking with the supplier
▪Add a job to track the issue.
If you are carrying the cost of the warranty work, add a job and invoice for $0
There are two ways to invoice the job for $0:
1.All lines on the job are valued at $0, or
2.Add a journal stock that reports to a specific general ledger account (warranty work), and in the job value all the parts and labour, then enter a negative $ amount to bring it back to $0.
Customer has returned parts under warranty.
1.If not performed, create a stock location called Quarantine.
2.Create a non strict customer return to bring the faulty part back into stock.
3.Fill in the header of the return, and add the stock to the grid. Select the Quarantine location in the Transfer To field in the stock grid. Enter a $0 price, as the customer does not need to be provided with a credit. Set the status to Finish.
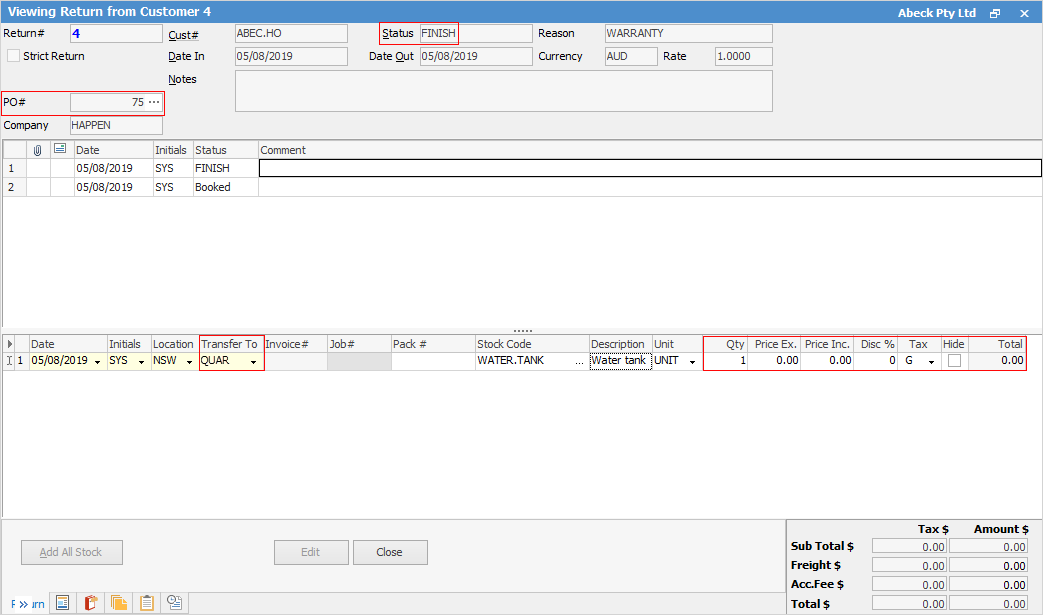
4.Once the non strict return is finished, a debtor's purchase order is created, which can be accessed by clicking the ellipsis [...] beside the PO# field in the return.
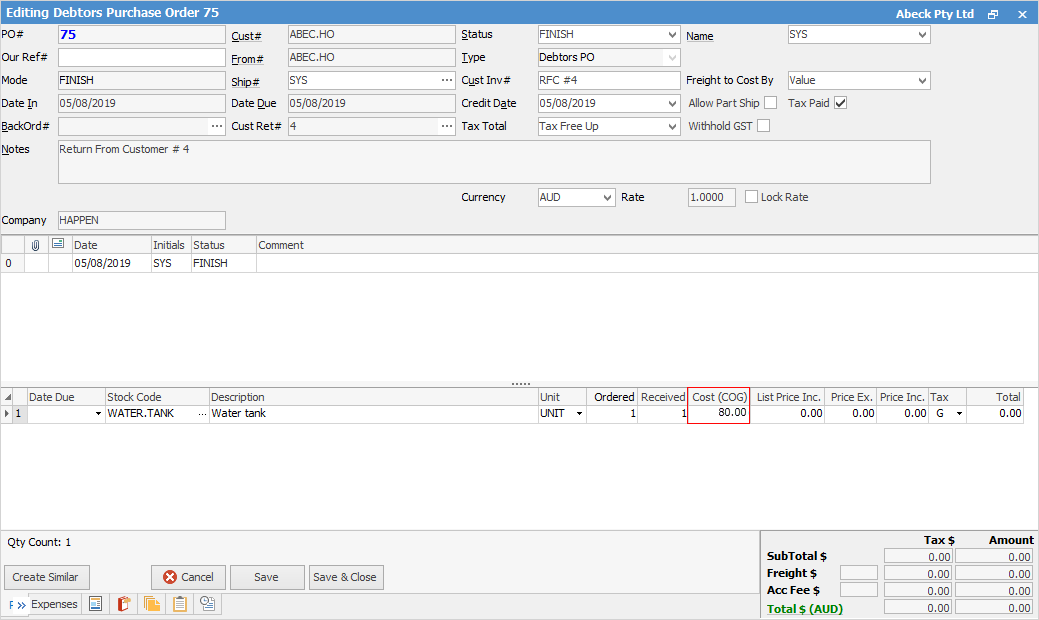
5.Confirm the cost of goods on the debtor's purchase order, which should match what was originally paid for the warranty part, and set the status to FINISH.
6.Create a return to vendor, enter the debtor's purchase order number in the PO# field and select the vendor cardfile. Click the ellipsis [...] in the Stock Code field in the stock grid. Change the stock location in the Select Stock screen to QUAR and apply Filter. Choose the stock to be returned and click OK.
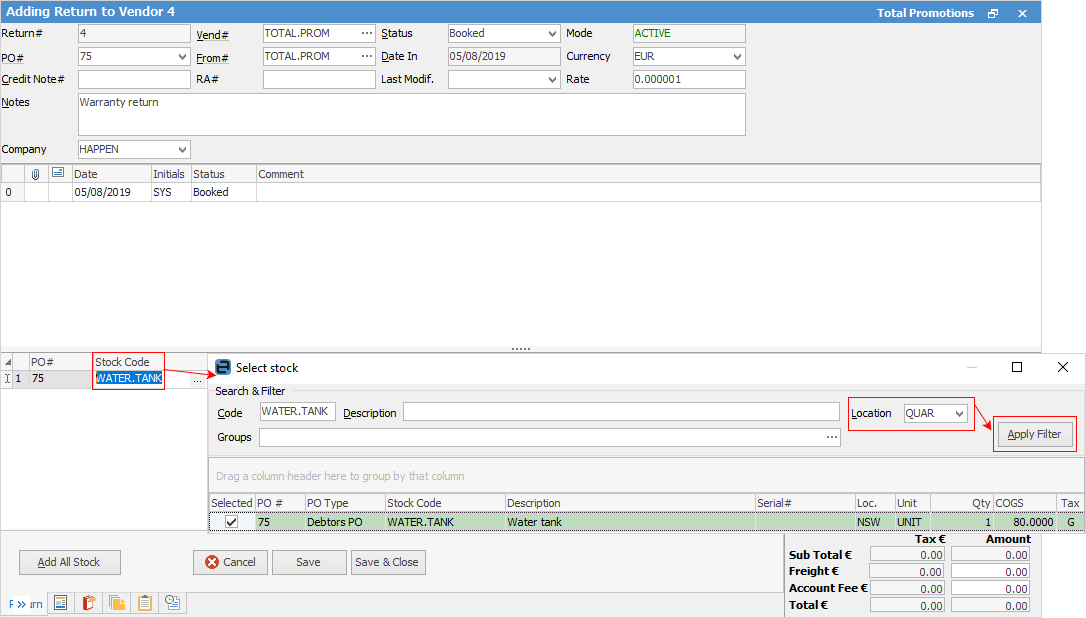
7.Confirm the quantity and price ex and set the status to Finish.
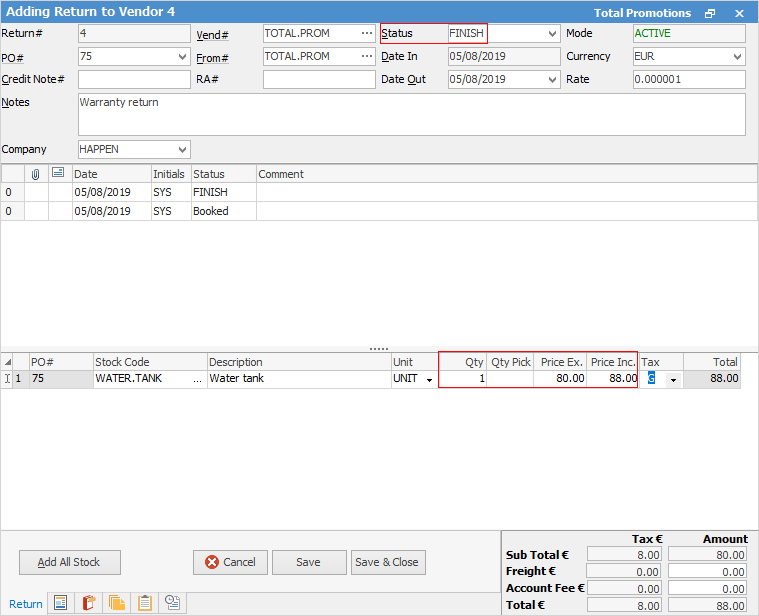
8.Once the status is set to Finish, a credit will be raised within the Creditor form.