The job is pivotal in defining who, how, when and what work is performed, and at what cost. That work and any related stock used is then invoiced to the customer. In Jim2, an invoice is really a report – generated using information from fields and grids within the job form, combined with information and calculation methods derived from the cardfile of that customer and specific Jim2 options and job options selected.
Invoice is a Jim2 function, not a status. The invoice indicates the job is about to leave the workflow and go to the customer. To create an invoice, Jim2 will check that a job or a list of jobs are either:
▪at a status of Finish, RAI.NR (Return As Is – Not Repaired) RAI.US (Return As Is – UnServiceable)
An invoice adds vital accounting information to the company records in terms of stock, profit, debtors and turnover. Jim2 gathers the information from invoices (as well as purchases, returns to vendors, returns from customers and payments) and creates transactions to update the general ledger, debtors and stock information.
 |
Jim2 manages the issues of recording and reporting GST requirements, and provides accurate and relevant BAS support documents to assist in fulfilling Australian Taxation Office specifications for the tax system. |
1.To invoice a single job, it needs to be at a status of Finish (or RAI.NR, RAI.US) and set to Ready. When trying to invoice a job without it being finished and ready, a warning will appear:
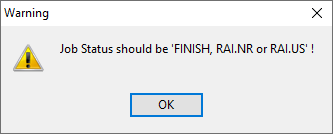
Jobs should not be finished/readied until all required fields are populated. A warning will pop to screen explaining the fields should not be empty, however this can be bypassed, if required.
2.Select Invoice Job on the ribbon. This icon will only be enabled if the job can be invoiced.

 |
On the Payment Details screen, function keys F4 through to F10 will allow selection of a payment method. F2 will go to the Invoice Details tab and F3 will go to the Payment Details tab.
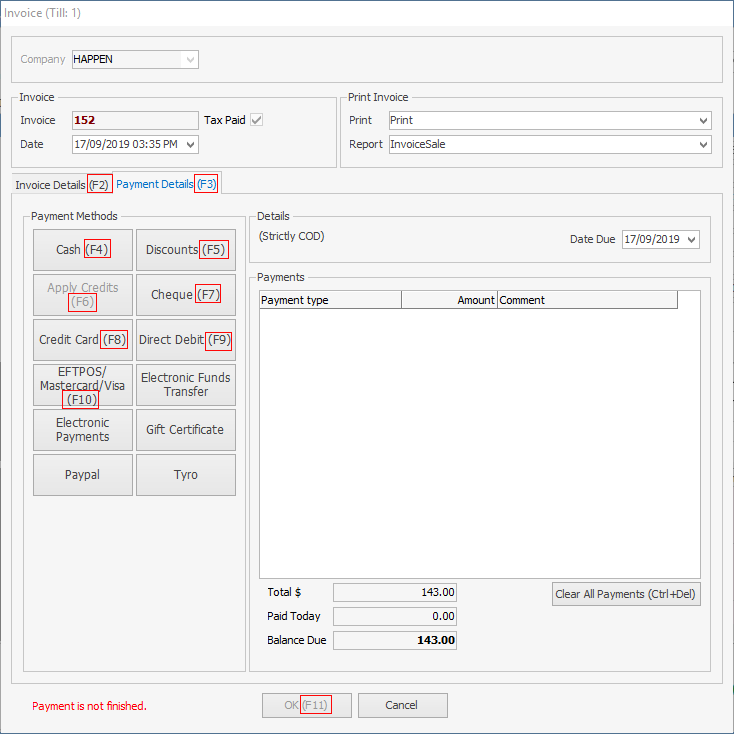
The F11 key also completes the invoice.
|
The Invoice form will now be updated with invoice number, customer and shipping details. However, this default information can be overridden by using the Tab key or mouse to move to a field, highlight and re-edit. The exceptions are the Invoice#, Branch (if branches are enabled), Sub-Branch, GL Department and Tax Paid fields, as they form part of the secure quality record for that job. Go to the Payment Details tab and choose the method of payment.
In the Print Invoice section at top right of screen, there are a number of selections you can make in regard to printing/sending invoices:
 |
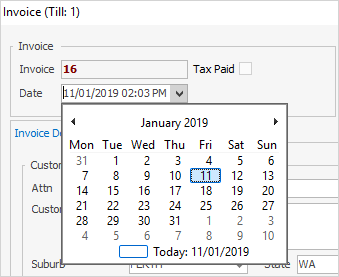
To backdate invoices, change the date in the Invoice section of the popup when invoicing, and this will flow through to the debtors listing.
Note: An error may pop to screen if backdating the invoice could affect a GST statement. This is a safeguard allowing for checking that this is the correct thing to do.
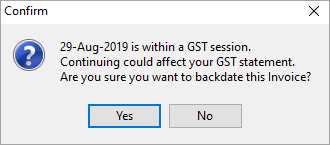
If you backdate an invoice, the COGS will be dated the same date as the invoice. |
| 2. | Check all details are correct and select OK or press F11. This will generate the invoice report, which will either print immediately or just be recorded, depending on the Job Invoice Option that have been set up, or what is chosen from within this screen in the Print field. |
Email will send an invoice and print one copy if Printer 2 is set up to print 1. If not set up, Email will send only.
 |
The Branch (if branches are enabled), Sub-Branch and GL Department fields will only be displayed if these have been enabled in Options. These fields are not editable at the time of invoicing the job – these fields must be selected in the job and will then carry over to the invoice. If the Branch, Sub-Branch or GL Department on the Invoice screen is incorrect, cancel the invoice, un-ready the job, then edit to change the values. |
Once invoiced, the Mode field name in the Job header will change to Invoice# and the invoice number will show in that field.
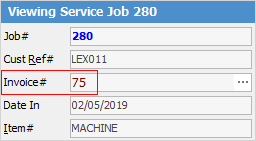
When selecting the ellipsis [...] beside the Invoice# field, a Print Invoice Selection Box will appear and preview and/or reprint the invoice.
 |
If the customer has been set up with terms of COD, the job cannot be invoiced until payment is received. |
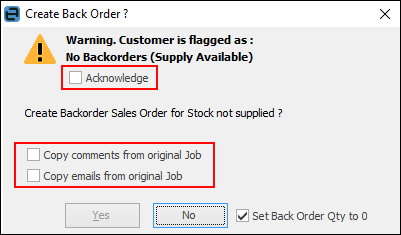
If a job which has a back order quantity on it is invoiced, after invoicing the following will appear – select any/all of these options:
Further Information
Default Invoice Report Options
Apply a Credit Payment When Invoicing
Invoice COD Customer Without Taking Payment
Raise a Tax Invoice for Progress Claims
Receive Payments when Invoicing
NZ Invoices to Handle Billing NZ GST
