
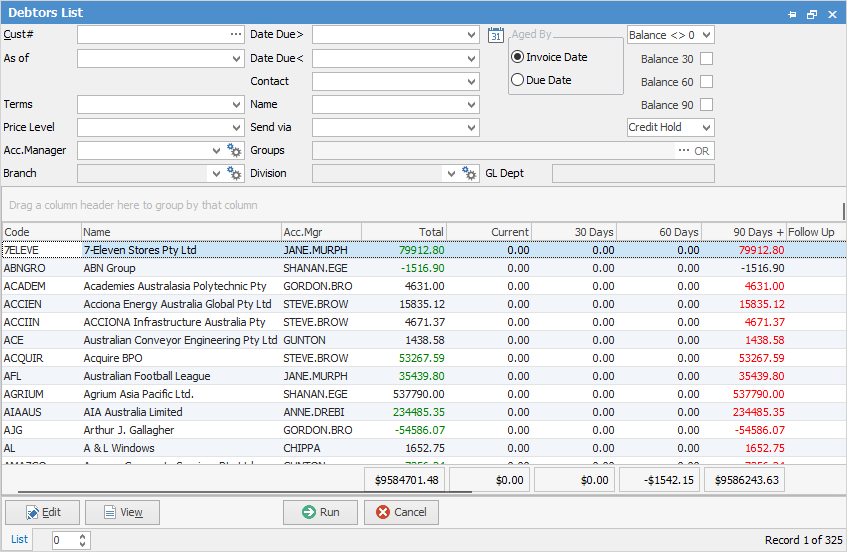
To edit (ie. add payments), view or report on a debtor, a group of debtors, or produce your debtor statements, you need to filter the available debtors using the Debtors List. The Debtors List comes to active view when you select Accounts > Debtors on the ribbon and click Run.

The Debtors List can also display all customers/vendors, regardless of whether they have a balance or not. A useful feature of the Debtors List is that you can filter by Account Manager.
 |
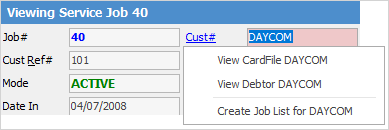
Jim2 includes a hyperlink from the customer's card file straight to their debtor record – this hyperlink can be accessed by hovering over Cust# in a job, then choosing the View Debtor link.
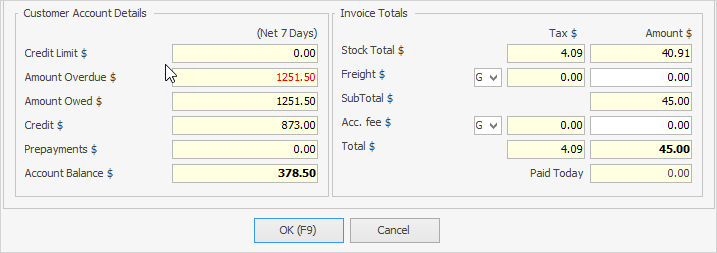
When invoicing, Jim2 also provides access to the current debtor balance (for the customer being invoiced) in the Invoice screen.
 |
Sorting, searching and grouping are all available as per other lists in Jim2. Click on the column header in the grid you wish to sort, then drag it to the Group By area to group.

|
You will see some letters underlined in the field names within the header, eg. Cust#. Using Alt+ the underlined letter will jump you to the field beside that heading. |
You can use this list to locate a certain customer or group of customers using the filters in the top section of the form. The filters are explained below.
CardFile Filter |
Explanation and/or Note |
|---|---|
Cust# |
Customer's card code. |
As of |
You can select a specific date. |
Search for a customer by their terms of payment, eg. COD, Net 7 days, etc. |
|
Search for customers within a particular price level. |
|
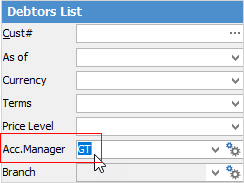
Acc.Manager |
Select a specific account manager to filter your list by. See Relative Names (towards the bottom of this page) for more information. |
Branch/SubBranch/GL Dept |
Branch and sub-branch will only show if they are set up in Jim2. Enter GL Dept if required. |
Date Due> |
Date due is after the date entered here. |
Date Due< |
Date due is before the date entered here. |
Contact |
Contact name from the card file. |
Name |
The customer's name. |
Send via |
Choose the send via method, eg. Print, Fax, Email, Email and Print, Don't Send. Choosing Email will email an invoice and print one copy if Printer 2 is set up to print 1. If not, Email will send only. |
Groups |
Any card file groups for filtering. |
Aged By |
Select either Invoice Date or Due Date. |
Balance |
See below table. |
The right-hand side of the form header contains the following options.
Balance Filter |
Explanation and/or Note |
|
|---|---|---|
Balance |
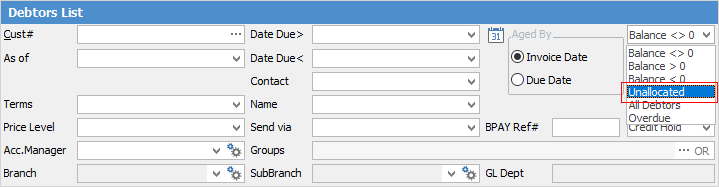
In the drop-down list , choose from one of the six options here: |
|
Balance <> 0 |
Debtors with a balance greater or less than 0. |
|
Balance > 0 |
Debtors with a balance greater than 0. |
|
Balance < 0 |
Debtors with a balance less than 0. |
|
Unallocated |
Shows any credits that have not yet been applied. |
|
All Debtors |
View all debtors, whether they owe money or not. |
|
Overdue |
Show all overdue. |
|
Balance 30 tick box |
Select debtors who still owe money after 30 days, but less than 60 days. |
|
Balance 60 tick box |
Select debtors who still owe money after 60 days, but less than 90 days. |
|
Balance 90 tick box |
Select debtors who still owe money after 90 days or more. |
|
BPAY Ref# |
Enter a BPAY reference number if applicable. |
|
Choose from one of these seven options: OFF (Auto), ON (Auto), OFF (Manual), ON (Manual), ALL ON, ALL OFF, ALL if required. |
||
The three bottom fields are self explanatory: Branch, SubBranch, GL Dept.
Grid Result Groups

Not all columns are showing in this image
Field |
Explanation |
|---|---|
Code |
The customer's card code. |
Name |
The customer's name |
Acc.Mgr |
Account manager as set up on the customer card file. |
BPAY Ref# |
You can look up debtors directly via their BPAY Ref# within the Debtors List (if you have elected to use BPAY). |
Total |
The customer's total balance. |
Current |
The current balance. |
30 Days |
The 30 days balance. |
60 Days |
The 60 days balance. |
90 Days + |
The 90 days and over balance. |
Follow Up |
The follow-up date of any notes that may have been entered for this customer. |
Via |
The method by which statements are sent, ie. Email and Print, Print, Fax, Email or Don't Send. Choosing Email will email an invoice and print one copy if Printer 2 is set up to print 1. If not, Email will send only. |
Terms |
The terms of trade (payment due) for each listed customer. |
Credit Hold |
Ticked indicates the customer is on credit hold. |
Credit Limit |
This column displays a listed customer's credit limit, if applicable. This will display in red if the limit has been exceeded. |
Overdue |
Box(es) will display as ticked to indicate overdue payment(s). |
Branch/SubBranch/GL Dept (3 fields) |
Which branch, sub branch and GL department. |
Amount Overdue |
Overdue amount(s) shown in this column. |
 |
In the Debtors List, the Total column will show in green if there are unallocated credits. |
Before commencing debt collection activities, it's a good idea to run the Debtors List first by Unallocated to ensure that all payments have been applied to the relevant invoices, and are not sitting as unapplied credits.
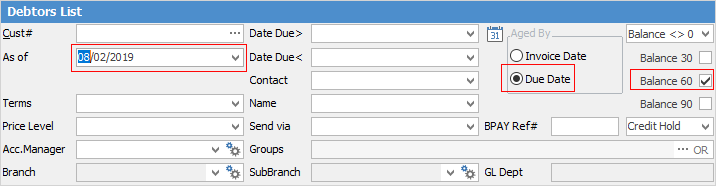
Example Debtors List: 60 Days
Run the Debtors List as of a specific date, then select Balance 60. The list will return only debtors with a balance in the 60 days column, allowing you to send out statements based on this list.
Alternatively, you can select Due Date and set the due date you require. Run the list based on that date. The resulting list will show all debtors who have invoices that have a due date prior to your nominated date, allowing you to send out batch statements based on this list.
If your security allows it, you can right click within the list grid, select Export Data and save the list information as an XLSX file.
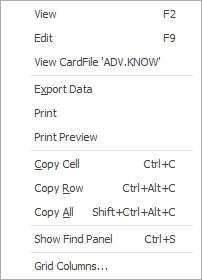
As you can see from the above image, you have a number of other useful right-click options, all self explanatory. Grid Columns... allows you to add further columns to the grid.
Further information: