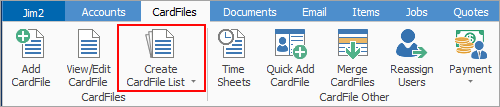
After running a CardFile List, there are several options available to process the results. They can be chosen from a drop down list by right clicking in the list grid.
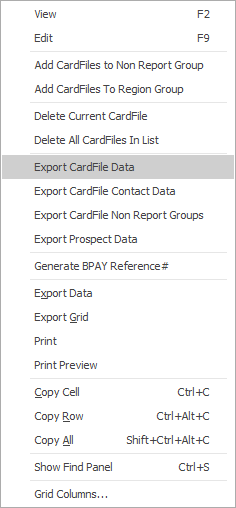
Right Click Option |
Function |
||
|---|---|---|---|
View |
View the highlighted cardfile. |
||
Edit |
Edit the highlighted cardfile. |
||
Add CardFiles to Non Report Group |
Adds all cardfiles in the list to the Non Report Group selected. |
||
Add CardFiles to Region Group |
Adds all cardfiles in the list to the Region Group selected. |
||
Delete Current CardFile |
Deletes the highlighted cardfile. |
||
Delete All CardFiles in List |
|
||
Export CardFile Data |
Exports the list information to a spreadsheet. |
||
Export CardFile Contact Data |
Exports the list cardfile name and contact details to a spreadsheet. |
||
Export CardFile Non Report Groups |
Exports card code, name and non report group information to a spreadsheet. |
||
Export Prospect Data |
Exports the list information for all prospects in the list. |
||
Generate BPAY Reference# |
Generates BPAY Reference numbers for all cardfiles in the list. Only works on a Customer CardFile List. |
||
Export Data |
Exports data from the grid to a spreadsheet file. |
||
Export Grid |
Exports the grid to a spreadsheet. This is particularly useful if the grid has more than one header row, as it will export all header rows. |
||
Print the list. |
|||
Print Preview |
Preview the list to be printed. |
||
Copy Cell |
Copy the highlighted cell. |
||
Copy Row |
Copy the highlighted row. |
||
Copy All |
Copy all within the list, which can then be pasted into a spreadsheet |
||
Show Find panel |
Opens the Find panel:

|
||
Grid Columns... |
Allows adding more columns. Also allows removal of columns. Select the column to add, then drag it to the position required in the columns within the grid. To remove, click and drag to the Grid Columns... window, or drag down away from the header area. |

Once a cardfile list is created, either preview, print, email, or fax that list.
To do this:
1.Search for the cardfile list to print, by either:
▪Clicking Create CardFile List on the ribbon, to create a new list, or
▪Selecting one of the cardfile lists already created in the Jim2 Nav Tree on the left.
2.Once the list to print has been run, etc. select the Jim2 Reports drop down list box in the ribbon, and select the report required.
 |
Jim2 is supplied with some standard CardFile List reports, suited to most businesses. If necessary, design custom reports using the Jim2 Report Designer. |
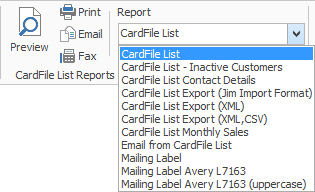
3.Once the report been chosen, select the print option to use.
 |
Th list information can also be printed by right clicking within the list grid, and choosing Print. |
Address labels can also be printed on A4 sheets from a CardFile List. It is possible to create a report (via Copy from Existing) in Report Designer to produce labels on rolls for use with a label printer. To print one label, run a CardFile List by entering the card code in Card#.
Further information
Bulk Update CardFiles with BPAY Ref
Export a CardFile Report to Spreadsheet