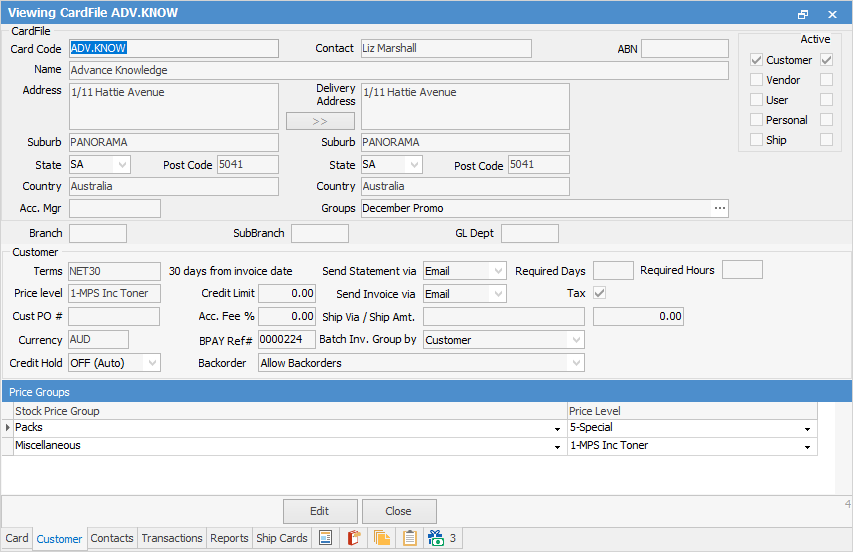

This section outlines and explains the terminology of the Jim2 CardFile form. A cardfile is a record of customer, vendor, user (employee), personal, shipping details, or any combination of these. Cardfiles hold name, address, delivery address, customer type, debtor terms, contacts, usernames, passwords, etc. within Jim2. When setting up these cardfiles, specify a unique card code and the information contained within the card is used within other areas of Jim2. For example, when adding a job, a customer card code is required to be entered. From that code, Jim2 can find the name, address, etc. for that customer. This information is used when printing reports, automatically filling in the name and address, etc.
A Jim2 CardFile form is divided into the following specific information areas that will provide a complete detailed record of:
▪the cardfile information via the CardFile header
▪the active tab information, additional tabs and buttons in the cardfile footer.

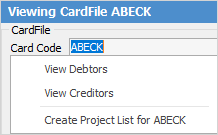
Most Jim2 forms have hidden hyperlinks that will open another relevant form. Cardfiles have only one hyperlinked field: Card Code.

If the cardfile is that of a customer, the Card Code hyperlink will go to that customer's debtor record. Similarly, if it is a vendor, their creditor record can be opened. If the cardfile is both a customer and a vendor, the choice to view debtors or creditors is available. A project list can also be created for the customer, if the company is licensed for Managed Services or Managed Print Services Editions.
More information about hyperlinks can be found here.
To go back to the original form, close the current form.
The Payment icon on the ribbon is specifically designed for taking prepayments against jobs and cardfiles only. Payments against invoices should be entered via the Debtor records.
 |
If the address details are changed on a cardfile, this information will flow through to all jobs, etc. from that point onward – it will not update address details on objects already booked/finished, etc. (for historical purposes). |
Further information |
|
How to |
|
|