This area of the cardfile allows entering and tracking of one or more contacts for that customer, vendor, prospect or user, and record their phone numbers (including direct numbers), fax numbers, email addresses, mobile numbers, bank account details, etc.
 |
Note: The phone number field in a contact is limited to 20 characters. |
To add a contact, edit the cardfile and go to the Contacts tab in the footer. Click New Contact and enter all relevant details. When finished, enter more contacts by again selecting New Contact. There is no limit to the number of contacts that can be added to a single cardfile.
Add relevant information into the fields on the form. The purpose of each field is detailed in the table below.
To edit an existing contact on a cardfile, go to the Card tab in the footer, locate the contact and double click on it to go to that contact's tab. Now click Edit to edit the contact's details.
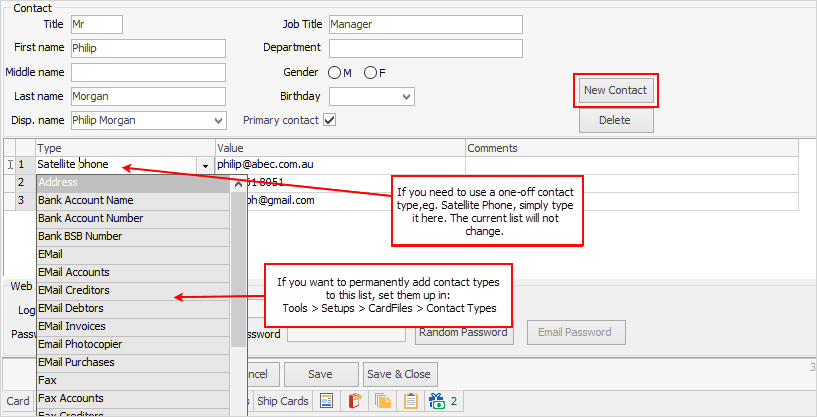
Users can add their own contact types, either on the fly for one-off use, or add their own via Setups to add to the drop down options selection.
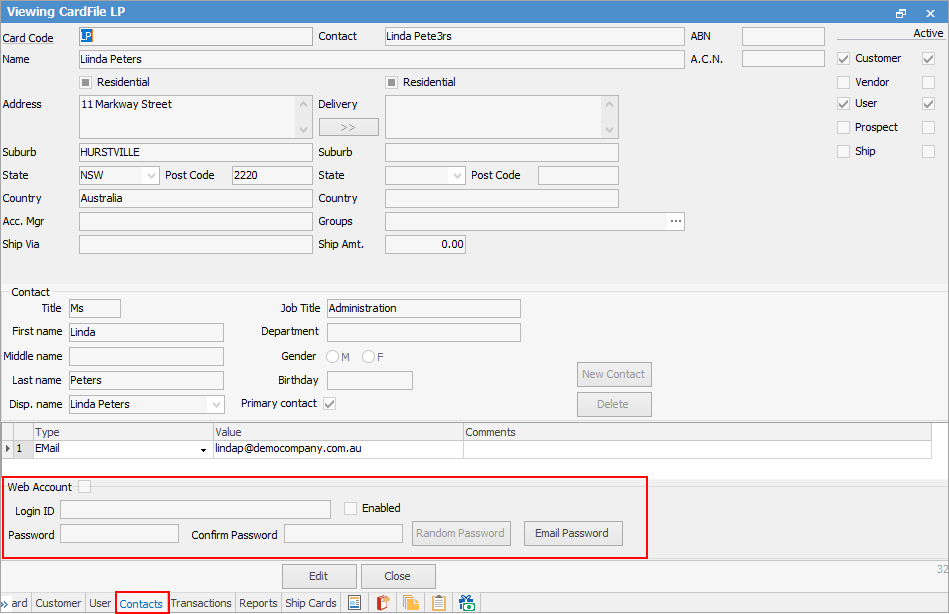
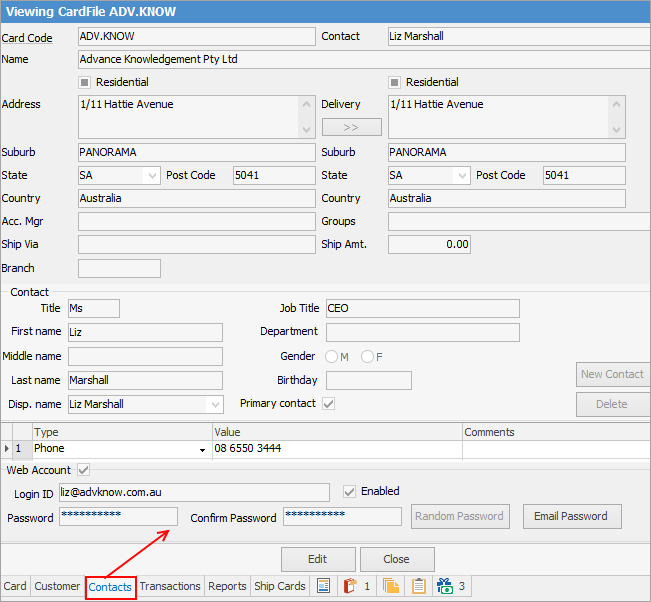
Cardfile Contacts allows enabling and managing of web accounts, ie. allowing a contact to log on to Jim2 web framework including eBusiness Service and eBusiness Meter Reads.
|
The Value field for Email will allow 254 characters, including spaces and special characters. |
You can add a contact type of Ship Instructions and this will appear on the Invoice tab of all jobs created for the customer.
 |
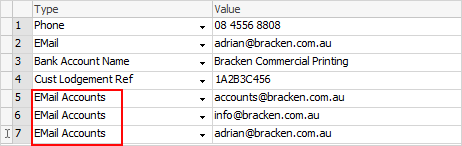
More than one email address can be added against one email contact.

Enter the first address, followed by a semi-colon (do not add spaces), then more email addresses, each followed by a semi-colon, up to 254 characters in total. Alternatively, add as many emails as required for one type, ie.
 |
 | Contacts tab fields |
There are a number of fields and buttons within this tab:
There are three Contact grid fields/columns for each contact type:
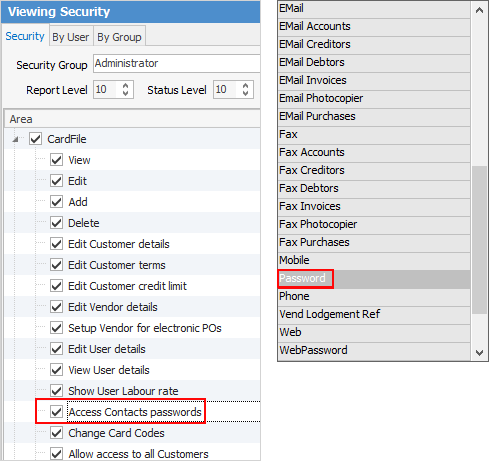
The Contact Type of Password has a setting in Tools > Security > CardFiles > Access Contacts Passwords. If this is not ticked for the user/user security group, adding or changing passwords will not be possible.
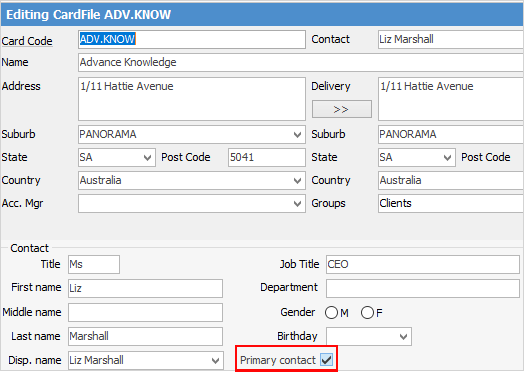
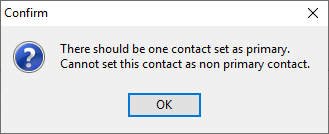
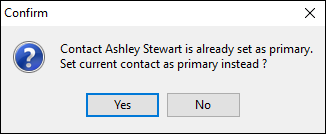
The first contact added will be set as the primary contact for the cardfile. This main contact and their information will show in the contact list in a slightly different colour (currently light blue background) for easier viewing. The primary contact can be changed at any time by unticking that contact and ticking another contact as Primary Contact:
|


There are enhanced (system) cardfile contact types that are used to email or fax reports to the right person. The main purpose of these contact types is to cater for large organisations who may have separate accounts payable and accounts receivable departments, or to handle situations where the invoices and statements go to different people. |
Further information
Bulk Update CardFiles with BPAY Ref