The term printing relates to how statements will be produced, ie. emailing, printing a hard copy, etc. It means that statements will be emailed from the default email address on the user's cardfile, unless an email template and email editor rules for sending statements from a Debtors list have been set up.
1.On the ribbon, go to Accounts > Debtors, and filter the Debtors list to suit the statement requirements here.  2.For a typical statement period, choose an As of date (a date is required in this field, even if it is today's date) and Send via, then click Run. The default filter will show any debtor whose balance is greater or less than $0 and owing prior to the As of date. Further filtering by due date, balance 30, 60, 90 days, etc can be performed to create a more specific list. 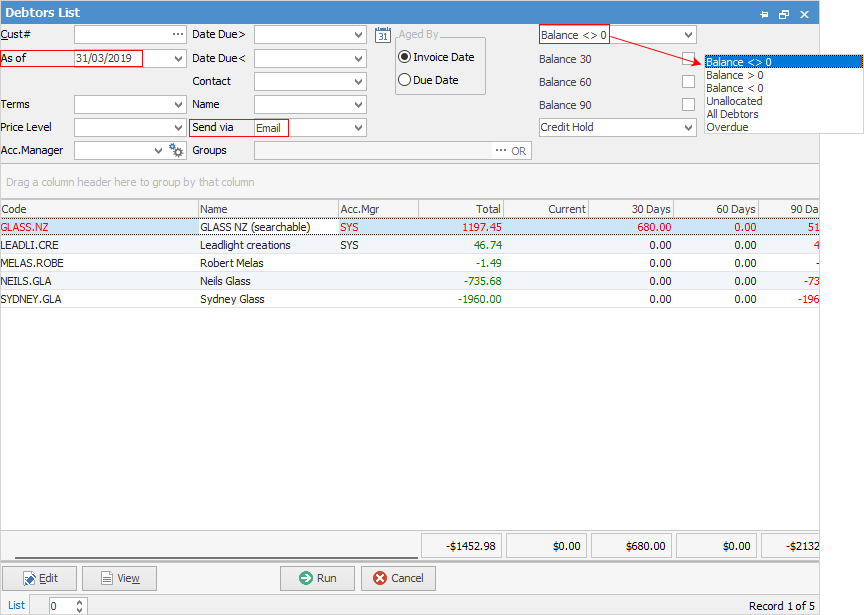 2.From the ribbon, select the Statement report: 
Change the statement date to match the date entered in the Debtors list header earlier. To filter information that appears on the statements, tick the boxes required. If all the boxes are ticked, only the those open will show on the statements, ie. only unpaid invoices. Click OK and the statements will either print or email, depending on the Send Via method selected earlier. 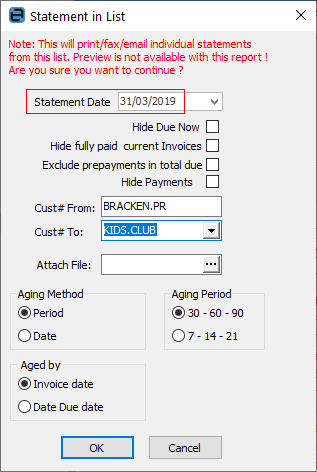
|
A section of the available statements can be printed by selecting the Cust# From, and Cust# To card codes. This is ensures everyone else is not stopped from being able to print while statement run is being performed.
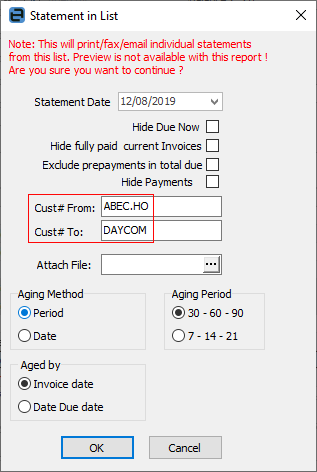
The debtor statement methodology allows for effectively preselecting the range and information on debtor statements prior to sending them. Looking at the selection criteria above, they can be used in any combination to produce all or batched statement runs. Any combination of these checkboxes can be set as default, using Global Variables.
There are two global variables which can be added to set default aging when running statements. And the defaults will show as: ▪Aging Method: Date ▪Aged by: Date Due 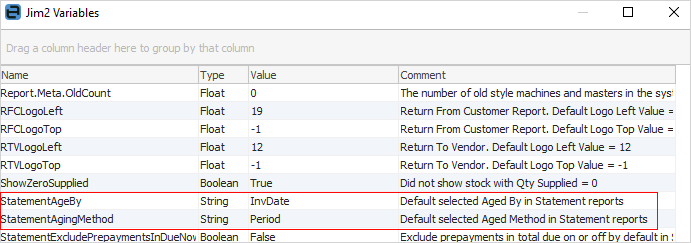 3.Click Print or Email. Jim2 will now refer to the cardfile of each debtor for the default statement print option (set via the Customer tab) to either print a hard copy, fax, email or email and print. Email will send the statement and print one copy if Printer 2 is set up to print 1. If not, Email will send only. |
Open the debtor form and select the Statement report. Click Print in the Report menu and the following screen will appear. Select criteria relevant to the statement to be produced.
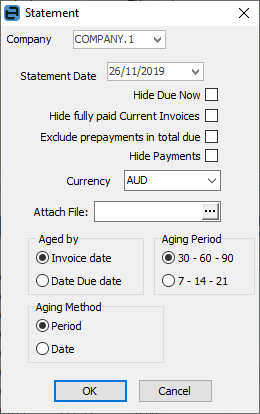
Click OK.
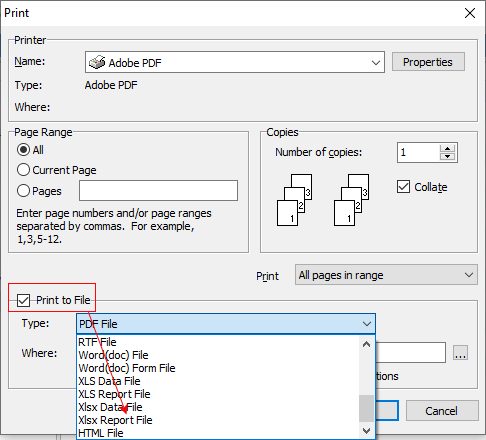
If the statement is required to be saved to a spreadsheet file, this is done from the Preview screen.

 |
 |
The statement report can be personalised to contain a message which can be changed to suit marketing or seasonal needs, or to add banking direct debit details. Of course, statements can be pre-sorted using the Debtor list criteria, then this information can be used to further personalise statement information. |
Further information
Debtors Allocate Payments Grid
Enter Discounts and Account Fees
Debtor Payments Including Commission
Move Unknown Payments to Debtor


