|
To commence adding purchase orders into Jim2, Option defaults must first be set up and information entered into user and vendor cardfiles. |

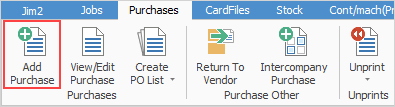
1.Click Add Purchase on the ribbon.
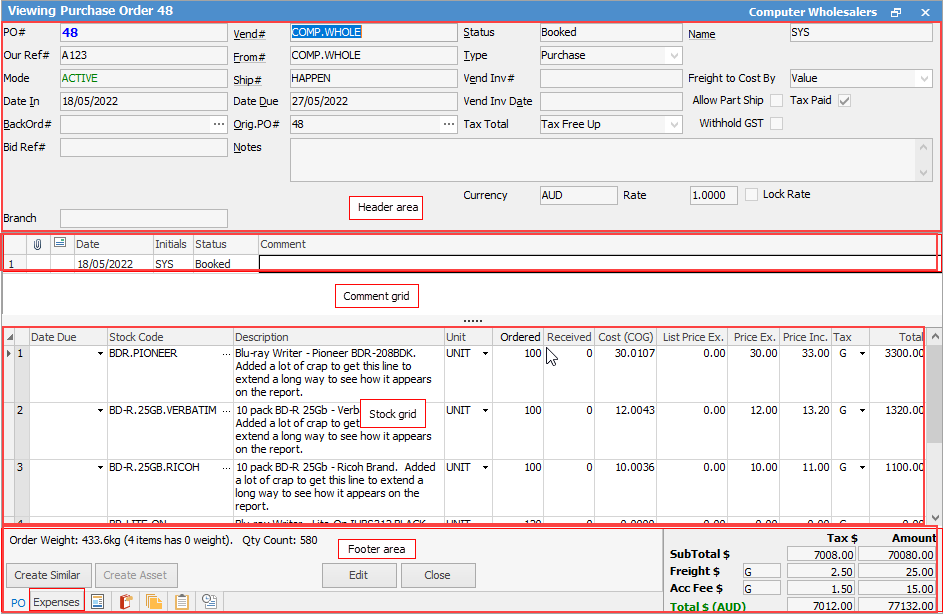
2.The Adding Purchase Order form is displayed. Jim2 automatically fills some fields in the purchase order header, including the PO#, Status, default Ship# (if set in Tools > Options > Purchases), Type, Date In, Orig. PO#, Tax Total, Freight to Cost and Account Fee Tax Codes.
|
Some letters in the field names within the header are underlined, eg. Vend#. Using Alt+ the underlined letter will jump to the field beside that heading. |

Jim2 is designed to prompt user input by placing the cursor at the appropriate fields that the user is required to complete. The Enter key will move the cursor to the next user input field in the purchase order entry pattern. The pattern follows:
▪Vendor Card Code#
▪Vendor Invoice Date
▪Vendor Invoice#
▪Notes – Shipping or payment notes
|
Some of this default information can be overridden by using the Tab key or mouse to move to that field, highlight and re-edit. The exception is that the PO# and Date In cannot be edited as they form part of the secure Quality record for each Purchase. |
2.Select a vendor in one of the following ways:
▪Start to enter the vendor code. Jim2 intuitive type will begin to (numerically/alphabetically) pre-empt the choice of names from the card code list information is entered.
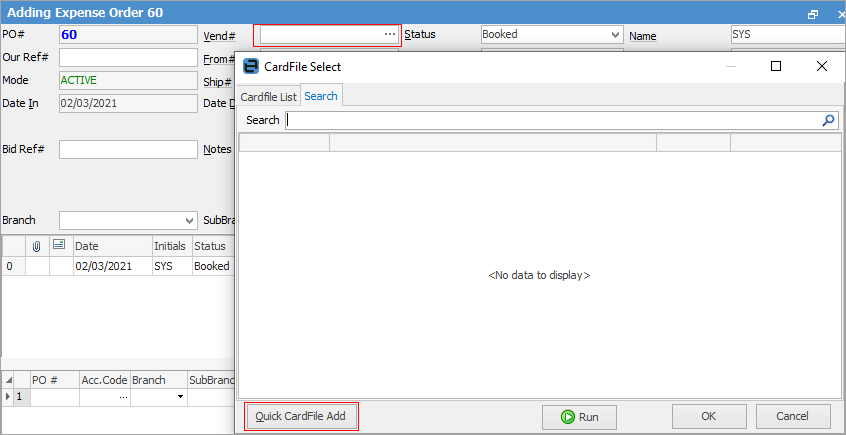
▪Click the ellipsis [...] beside the Vend# field to display the search screen.
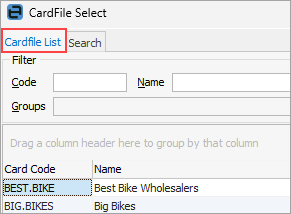
▪A full list of vendors can be accessed via the CardFile List tab, then choosing from the list.
If there is no cardfile for the vendor, when in the Cust# field use F5 select Quick CardFile Add to enter a new cardfile. This can then be used on the current expense order.
|
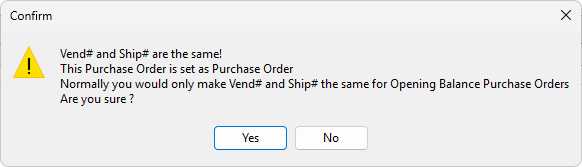
If the Vendor# and Ship# are the same on a purchase order, when finishing the order a confirm message will appear if the purchase order is not an opening balance purchase order. It would be highly unusual for a purchase order that is not an opening balance purchase order to have the same Vendor# and Ship#. |

|
Jim2 uses information and calculations from the vendor cardfile records to automatically add default information into certain fields of the purchase order. To change any of these default values, move to the field to change and use the drop down list in that field, or highlight and change the entries. |
3.Select a date the vendor has promised the goods are to be delivered by as the date due, or use the required days information calculated using information from the vendor's cardfile.
4.Enter a specific message in the Notes field in the Purchase Order header – any special delivery or payment messages (this message will appear only on this purchase order).
5.Add comments and stock to this purchase. The F3 function key will move to the Comment grid and the F4 function key will move to the stock grid.
|
The Job# column will populate if this purchase order has been auto created from a job. Nothing can be entered here otherwise.
The Location column (in expanded view) will populate with a location, however this can be edited. |
6.The stock grid of any purchase order is designed to record and calculate the quantity and cost price of all depleting, non depleting and special stock.

If necessary, expand the grid to view all possible fields, by selecting the  in the top left corner of the grid.

Select the stock grid by either:
▪Pressing the F4 function key, or
▪Clicking in the Stock Code field.
|
If adding multiple stock lines to the grid, at the end of the line pressing the Enter key will move to the next line in the grid, ready to insert another stock code. |
To add stock to a purchase order, move to the Stock Code field of the stock grid and choose stock in one of the following ways:
▪Press F5 whilst in the field, or select the Stock Code ellipsis [...] to bring up the Stock Select screen. Within this lookup view quantity on hand, back order quantity, etc, for any stock record. Click OK to select the stock.
▪Start to enter the stock code. Jim2's intuitive type will pre-empt the entry by showing possible stock codes from the stock records as information is entered. Use F5 whilst in the field to open the Stock Select screen at the currently pre-empted stock code.
▪Scan the stock barcode to automatically add the correct stock code.
|
The Stock Select screen allows location and selection of stock to be added to the purchase order. Narrow down the Stock List by entering some text (eg. partial stock code or description) in the search fields at the top of the screen and selecting Run. Now only stock which fits this filter will be displayed. Clear the search fields and select Run to see all stock displayed within the stock grid. For more information see the Purchase/Expense Comment grid section. |
•You can also import stock into the grid of a purchase order. Click Load Stock to purchase order on the ribbon (this needs to be enabled via Tools > Menu Scripts:
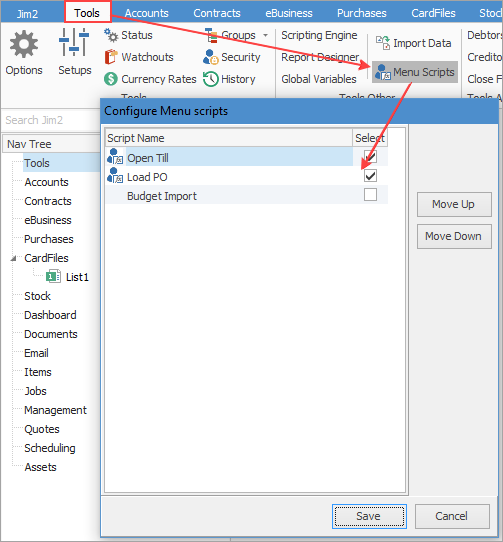
This will then appear in the Scripts area on the ribbon.

This will bring up the Load Stock onto PO screen, which will to allow loading stock to the purchase order via a CSV spreadsheet.
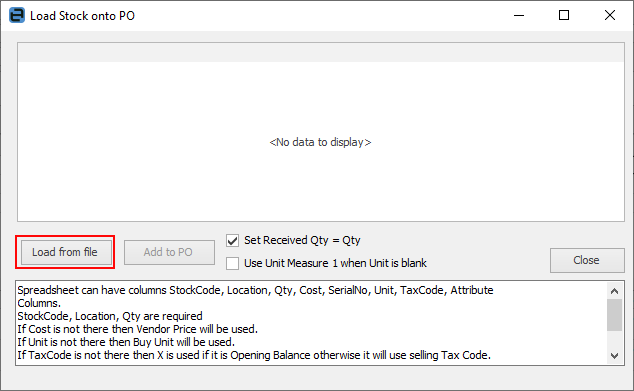
The lower section of the screen explains what is required in the spreadsheet, along with other important information:
▪Spreadsheet can have columns StockCode, Location, Qty, Cost, SerialNo, Unit, TaxCode, Attribute Columns.
▪StockCode, Location, Qty are required
▪If Cost is not there then Vendor Price will be used.
▪If Unit is not there then Buy Unit will be used.
▪If TaxCode is not there then X is used if it is Opening Balance otherwise it will use selling Tax Code.
▪Attribute Columns are columns with a heading prefixed with a *. The heading must be the Attribute name.
Click Load from file, and the stock grid will be populated with all relevant stock for the purchase order.
|
Note: Using this process, jobs will not be linked. |
Once the stock code is selected, the stock description field will be filled in automatically. If Serial on Purchase is ticked on the stock record, to add serialised stock a serial number will need to be entered (if required) by selecting the ellipsis [...] next to Description. Enter a job number. The parts will be added to that job automatically, and show the status of the purchase order.
|
If purchasing (or have purchased) stock for a job, add it to that job by entering the job number in the Job# field of the stock grid. If necessary, expand the stock grid fields by selecting the |
The Location field (in expanded view) will show the location, however this can be edited.
Select the unit measure of the stock being purchased and enter the quantity ordered from the vendor.
The stock grid will pick up the default stock location for purchases as set up in the user's cardfile, or specify a different stock location. Within the stock grid select another location – to view this area of the grid select the arrow in the top left-hand corner of that grid and it will show the expanded view.
Pricing in the stock grid is entered based on a number of scenarios:
▪Will depend on what is set up in Tools > Options > Purchase:
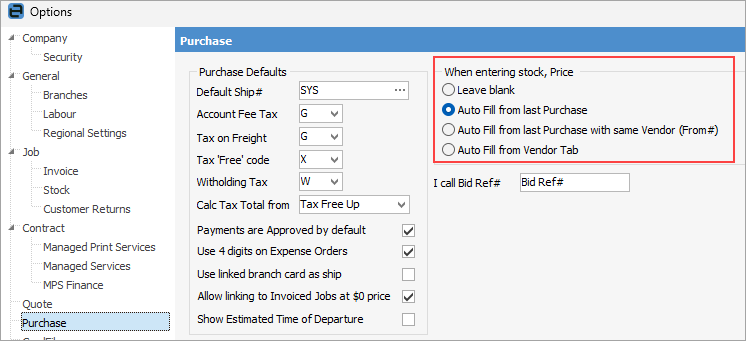
–Leave blank will not enter any amount.
–Auto fill from last purchase will use last purchase price, regardless of vendor.
–Auto fill from last purchase with same vendor will use the last purchase price from the same vendor.
–Autofill from vendor tab will use what is on the vendor tab. If nothing on the vendor tab, it will remain the same.
Further to this, if you select Recalculate Stock Prices via right clicking in the stock grid, the following occurs based on what is set in Purchase Options:
–Leave blank will recalculate back to 0.
–Auto fill from last purchase will recalculate back to last purchase price, regardless of vendor.
–Auto fill from last purchase with same vendor will recalculate back to the last purchase price from the same vendor.
–Autofill from vendor tab will recalculate back to what is on the vendor tab. If nothing on the vendor tab, it will remain the same.
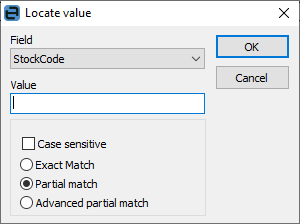
Within the stock grid, you can search all columns and rows by using Ctrl+S. This will bring up the Locate value screen, where select which field to search, enter the text to search for in the Value field.
|
A number of functions are available when right clicking within the stock grid – for more information see the purchase order stock grid section. |
7.Freight can be added to the purchase order on the bottom right of the purchase order form. If freight is added in this way, it will be distributed evenly over each of the stock lines.
8.Once the stock has been received and ticked off against the purchase order, update any prices and enter the vendor invoice date and invoice number (if you don't have the invoice yet, enter anything here as you can change it once you receive the invoice). Change the status of the purchase order to Received. This will update the stock records, allow the stock to be sold to customers and an estimated value (the total value including GST on the purchase order) entered into the general ledger accounts 1-XXXX Stock on Hand – Purchase Orders on Received and 2-XXXX Temporary Creditors – Purchase Orders on Received.
|
Note: The Create Asset button is used more by Managed Print Services as it is used to manage machines (ie. photocopiers) in the field. |
9.Once the invoice is received from the vendor, check the prices and edit if necessary, add any freight charges to the freight field in the purchase order footer, check that the purchase order total agrees with the vendor invoice total, change the status to Finish, and save the purchase order.
|
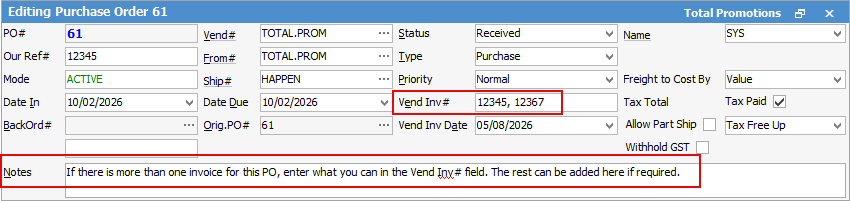
Note: If you receive more than one invoice from the vendor for the same purchase order, these can all be entered in the Vend Inv# field, although there is a character limit, so any that do not fit can be entered in the Notes field.
 |
Once the status is changed Finish and Save is selected, a message will appear to again confirm that the total figures in this purchase order match the invoice that has been sent from the vendor.
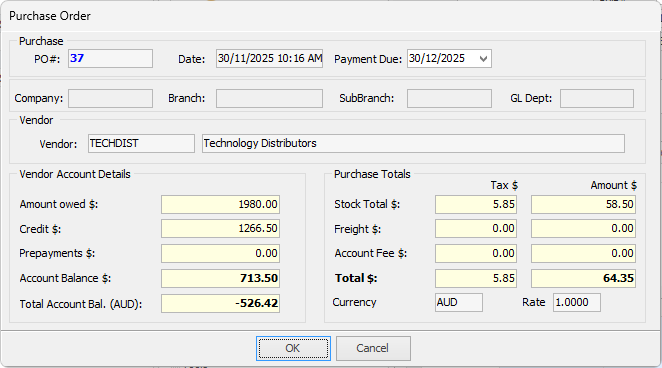
The Payment Due date can be changed here, if required.
The temporary entry will then be reversed and the real values will be posted to the exact general ledger accounts.
|
There are no financial transactions on purchase orders on statuses other than Received or Finish. |
8.Sometimes there is a small difference between the total of the purchase order entered into Jim2 and the total of the vendor's invoice. This can be due to the vendor's software using a different method of calculating GST (eg. calculated at line level or on the invoice total) or due to rounding. Jim2 calculates GST at stock line level. The purchase order total can be adjusted to match the Vendor invoice using two different method
The first method to try is to change the Tax Total method on the purchase order. For example if the default method is Tax Free Up try changing to Tax Paid Down.

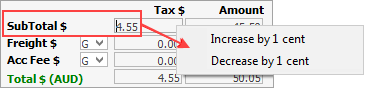
If there is still a small difference after changing the Tax Total method, use the Increase (GST) by 1cent or Decrease (GST) by 1cent function. Right mouse click in the Tax SubTotal field in the footer of the purchase order (or expense order) and choose to either Increase by 1 cent or Decrease by 1 cent. Repeat this as many times as required to balance the purchase order total to the Vendor invoice total.
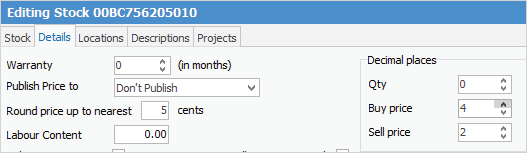
Using either of these methods often resolves any variance, however there are instances where there is still a discrepancy. As the purchase order amounts are driven by the stock record, change the stock record to use 4 decimal places which may alleviate this:
|
If a purchase order has been cancelled accidentally, edit it and change the status to what is required.
A purchase order can also be created from an email, and the email will be linked to the purchase order. |
Further information
Add an Amount to a PO when Finished at $0
Add Comments to a Purchase/Expense Order
Add Freight to a Purchase Order
Enter Progress Payments on Purchase Orders
Export a Purchase Report to Spreadsheet
Fix Incorrect Pricing after PO Finished
Fix Incorrect Vendor on Purchase Order
Handle Employee Reimbursements
Handle a Credit for Freight Charged
Link a Job to a Purchase Order
Link Expenses to a Purchase Order
Print a Purchase/Expense Order
Record One Invoice Number on Multiple POs
Record Overseas Purchases, GST, Import Costs