Open the stock, click Edit, then go to the Vendors tab.
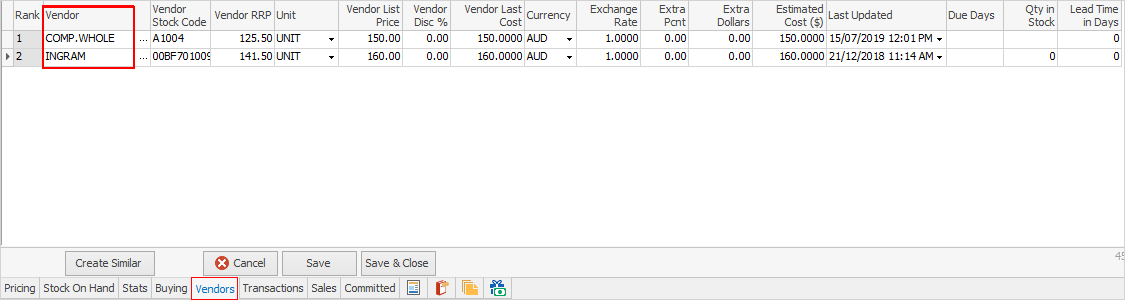
1.Either enter the Vendor#, or use the lookup screen by clicking the ellipsis (...) within the Vendor Code field.
2.Now enter the Vendor Stock Code. This may or may not be the same as the Jim2 stock code.
3.Enter the Last Cost for this Vendor – the Cost for the Vendor with the #1 ranking will be used when calculating pricing if there is none in stock. The Last Updated (date) field is used when there is none currently in stock, but has been purchased previously. Jim2 compares the dates and use the most recent.
You can rank these Vendors by preference, by clicking and holding the ![]() on the left of the Vendor line (with the mouse button) to move the Vendor to the required position.
on the left of the Vendor line (with the mouse button) to move the Vendor to the required position.

|
When printing a purchase order, the correct vendor code will be displayed next to the stock code that used for this part. |
Vendor codes can be deleted at any time.
Further information
Backfill Stock Sold in Advance
Buy and Sell in Different Measures
Change a Serial Number on a Stock Record
Export a Stock Report to Spreadsheet
Generate Backdated Stock on Hand Report
Move Stock from Depleting to Asset
Stop Users From Giving Discounts
Update Existing Vendor Pricing