
On the ribbon go to Machines > Add Machine.
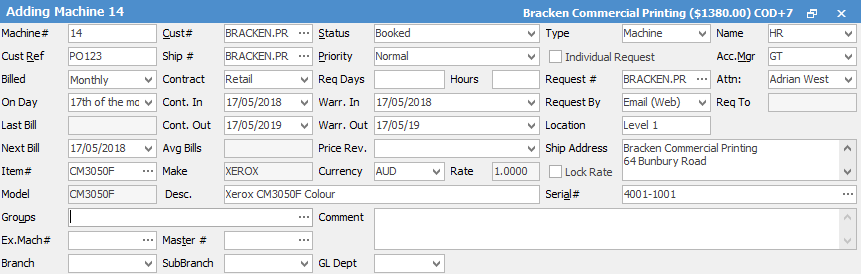
Complete the header information starting at Machine#. Although you can use the Tab key, it may be easier to use the mouse to navigate but still work through the sequence of left to right, then the next row, etc. to ensure nothing is missed.
|
You will see some letters underlined in the field names within the header, eg. Cust#. Using Alt+ the underlined letter will jump you to the field beside that heading. |

Field |
Explanation |
Machine# |
Auto-generated by Jim2. Can be changed. Can also be alphanumeric if entered manually. |
Cust# |
The customer card file that all jobs are invoiced to, and who any charges are typically billed to (excluding meter billing). |
Defaults to Booked (meaning a machine is in use). It could be set to TEMPLATE if this machine is used as a reference to set up other machines from. |
|
Machine or Master is selected to indicate that it is included in copy counts, whereas Asset is not included in copy counts, and could be used to identify other equipment that is maintained by service agreement, ie. telephone systems. This field determines the availability of the Meter Setup tab at the bottom of the Machine form. |
|
Name |
The technician who would generally service this machine. |
Cust Ref |
This would be the customer's standing purchase order number for all work on this machine, or the customer's identification (asset) code for this machine at a large site with asset control. Enter NIL if this is not going to be used so it will flow through to all jobs for this particular machine. |
Ship# |
Customer shipping address for consumable deliveries, or for which service technicians are assigned. As with normal Jim2 jobs, this will be the same as the Cust# if the customer only has one address, but will change to match the actual site address for multi-site customers. |
Priority |
Method of prioritising machine service (urgent, normal, low). |
Individual Request |
If a single contact is the meter reading contact for a range of machines, this field determines whether they receive an individual page request per contract, or a consolidated request. |
Acc.Mgr |
The person who handles this contract, typically the original salesperson. |
Billed |
Select the billing cycle for this particular machine (manual, monthly, quarterly, etc.). |
Contract |
Select the contract type (price level). This relates to the supply of consumables only, not meter reads. |
Req Days/Hours |
Planned response time for servicing this machine. |
Request # |
The card file code for requesting meter reads. This card file should contain the Meter Reading Request contact. |
Attn. |
Default contact for this machine at the customer's site. This contact must be set up on the ship card file first. |
On Day |
Select a particular day, ie. 1st of the month, 15th of the month for which billing is due. |
Cont. In |
The starting date of the contract on this machine. |
Warr. In |
The starting date of the warranty on this machine. |
Request By |
Sets how the Request for Copy Count will be sent to your customer. Note that if Fax is selected, it is necessary to have added appropriate Fax Photocopier details to the customer card file (Ship in the case of multi-site customers).
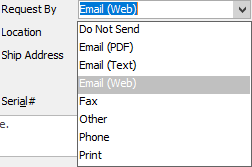
If you are using MPS Connectors, you will see these populated within this list as well. |
Req to |
Set automatically by Jim2 from the Request# card file, and selected Attn contact. |
Last Bill |
The last billing date. Automatically calculated. |
Cont. Out |
The finishing date of the contract on this machine. |
Warr. Out |
The finishing date of the warranty on this machine. |
Location |
Once arriving at the delivery address listed on the Ship# card file, additional location information, such as Library, CEO's office, etc can be entered here. Very useful for discerning which contract a customer may be calling about if they have multiple machines. |
Next Bill |
Scheduled date of next billing. This will be automatically updated after the first billing cycle, but you may enter the initial next billing. |
Avg Bills |
Avg Bills field is to advise the user how many billing cycles have been billed as an average read, not an actual read. It will indicate the number of consecutive average billed cycles until the machine is billed with an actual read, at which time the count will return to zero. |
Price Rev |
Enter the date the price needs to be reviewed. |
Ship Address |
Specific details about the location of this particular machine. By default, it will be the Ship address from the card file but it can be changed to other details, eg. Must report to Security before going on site, Enter via the northern door then turn left down the stairs, etc.
Note: Once a machine has been set up, if you change the Ship address on the card file, this field will not update. You will have to enter the new address manually. |
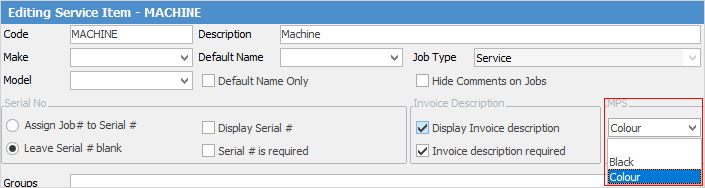
Item# |
The Item (model) this machine is linked to. This determines related stock and available meters. It's important to ensure that the Item has the correct MPS (Colour or Black) selected as this determines what Meter Type you can choose in the stock grid.
 |
Make |
Make of machine populated from the Item if required. |
Currency |
If you are using Multicurrency, select the currency. |
Rate |
The currency rate. |
Lock Rate |
Tick to lock the currency rate. |
Model |
Model of machine populated from the Item if required. |
Desc. |
The Item description populated from the Item, but may be changed or added to with details to appear on invoices, job sheets, etc. |
Serial# |
Manufacturer's serial number of the machine.
You can also set a barcode on a project using the Serial# field.
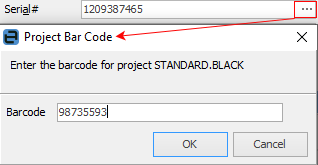
This allows for printing of a QRCoded URL that directs the customer to a page to submit service (or no logon) required. |
Groups |
Select Report or Non Report Group if applicable |
Comment |
General comments about this machine. This field is intended for key information that must be visible to staff when looking at the machine, and could be references to other notes on the machine, or procedures, etc. |
Ex. Mach# |
Enter the original machine number, ie. if this machine has been returned, refurbished and then put out under a new contract. This allows you to track machine history. |
Master# |
Enter the master machine number if this is a child machine. |
Branch/SubBranch/GL Dept |
Select Branch, etc if you are using branches. |
Further information: