Add a negative expense order either by linking it to the original purchase order or by posting to a specific general ledger account.
To post to a GL account
On the ribbon, go to Purchases > Add Purchase.
![]()
1.Choose Expense from the drop down list in the Type field of the header. Some fields in the header and other areas of the form will be added/removed as appropriate, and Adding Purchase Order xxx in the header will change to Adding Expense Order xxx.
|
The Adding Expense Order form will display default fields which include the PO#, Status, Ship#, Type, Date In, Cost Method and Tax Total. A field's default information can be overridden by moving to that field, highlighting and editing it. The exception to this is that the PO# and Date In cannot be changed, as they form part of the secure quality record for that particular expense. |
2.Select the vendor.
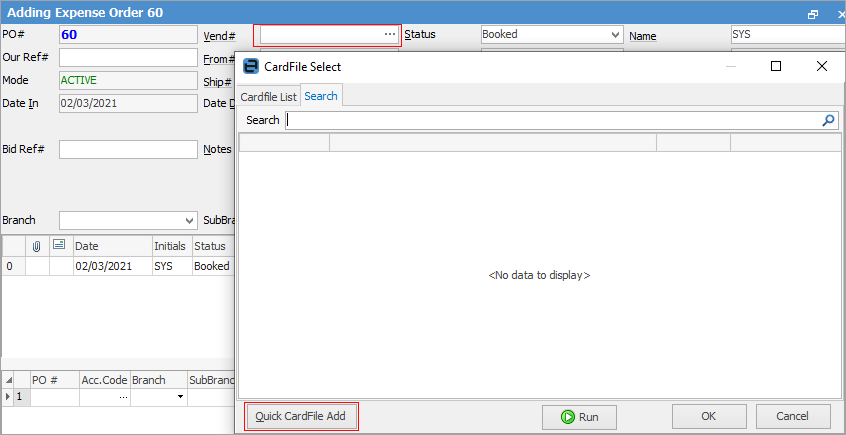
If there is no cardfile for the vendor, when in the Cust# field use F5 select Quick CardFile Add to enter a new cardfile. This can then be used on the current expense order.

|
Jim2 uses information and calculations from the vendor cardfile records to automatically add default information into certain fields of the expense order. To change any of these default values, move to the field to be changed change and use the drop down list active in that field, or highlight and change the entries. |
3.If required, enter a specific message in the Notes field in the Expense Order header.
4.Now add comments or stock to this expense. The F3 function key will move to the Comment grid and the F4 function key will move to the expenses grid.

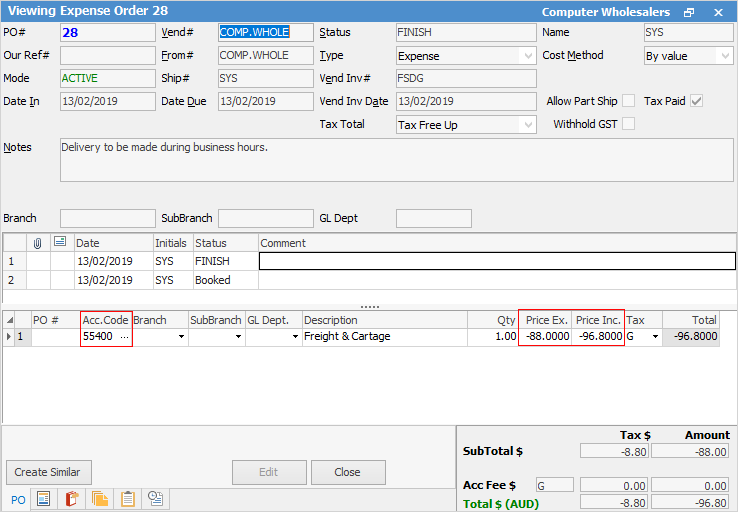
5.In the expenses grid enter the account code of the original purchase, then enter the price using the minus (-) before the amount. This will create a negative expense order.
|
Some letters in the field names within the header are underlined, eg. Vend#. Using Alt+ the underlined letter will jump to the field beside that heading. |
To link to a purchase order
On the ribbon, go to Purchases > Add Purchase.
1.Choose Expense from the drop down list in the Type field of the header. Some fields in the header and other areas of the form will be added/removed as appropriate, and Adding Purchase Order xxx in the header will change to Adding Expense Order xxx.
|
The Adding Expense Order form will display default fields which include the PO, Status, Ship#, Type, Date In, Cost Method and Tax Total. A field's default information can be overridden by moving to that field, highlighting and editing it. The exception to this is that the PO# and Date In cannot be changed, as they form part of the secure quality record for that particular expense. |
2.Select the Vendor.
|
Jim2 uses information and calculations from the vendor cardfile records to automatically add default information into certain fields of the expense order. To change any of these default values, move to the field to be changed and use the drop down list in that field, or highlight and change the entries. |
3.If required, enter a specific message in the Notes field in the header.
5.Now add comments/stock to this expense. The F3 function key will move to the Comment grid and the F4 function key will move to the expenses grid.

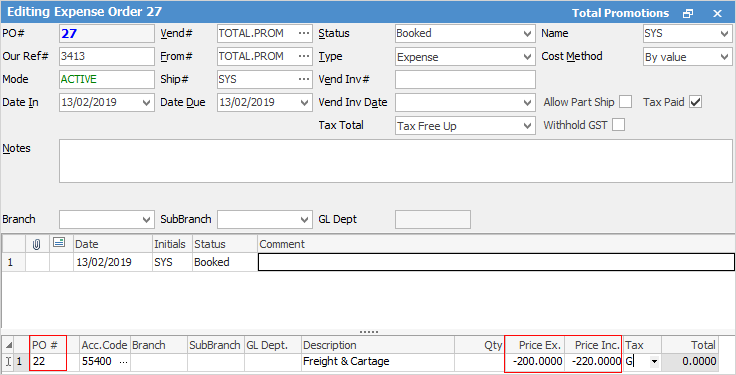
6.In the expenses grid enter the PO# of the original purchase, then enter the price using the minus (-) before the amount. This will create a negative expense order.
When linking the negative expense order to the purchase order, the general ledger account selected will not be impacted – it is a mandatory field on expense orders.
Further information
Purchase/Expense Order Footer Tabs
Purchase Order Approval Process
Opening Balance Purchase Order
Add an Amount to a PO when Finished at $0
Add Comments to a Purchase/Expense Order
Add Freight to a Purchase Order
Fix Incorrect Pricing after PO Finished
Handle Employee Reimbursements
Handle a Credit for Freight Charged
Link a Job to a Purchase Order
Link Expenses to a Purchase Order
Print a Purchase/Expense Order
Progress Payments on Purchase Orders
Record One Invoice Number on Multiple POs
Record Overseas Purchases, GST, Import Costs

