This section of the Purchase/Expense Order form contains a grid for recording relevant user comments to the purchase record, along with storing all related emails. Because these comments form part of the quality record for each purchase, any additions by a user are automatically time/date/initial stamped for accuracy and provide an excellent quality record of events.
 |
Note: Maximum character limit of 7950 within the comments. |
As a result, the comments within the grid cannot be reordered. Comments within the Comment grid are normally for internal use, and will not form part of the purchase/expense order print report that is sent to the vendor.

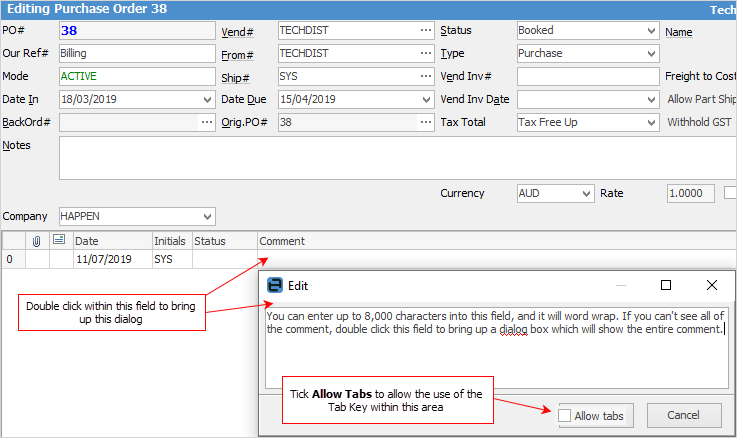
In Edit mode, double click in the Comment to bring up this dialog:
|
A time/date/initial comment line will be added to the Comment grid whenever the status of the purchase order is changed. Conversely, if a comment with a status is added to the Comment grid, Jim2 will ask the user if they would like to change the status of the purchase order.
 |
The fields within the Comment grid are described below:
Field |
Explanation |
|---|---|
|
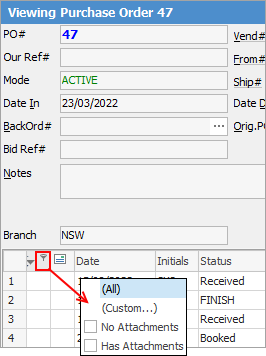
This icon will appear if there are attachments to an email. Select the paperclip and select Has Attachments allows you to view only linked emails that include an attached file.
 |
|
This icon will indicates that this line is an email, ie. received, replied, forward, read, not read. |
Date |
The date and time that the comment was added (hold the mouse pointer over the Date field and the time will appear). |
Initials |
Shows the initials of the user who added the comment. |
Status |
This field will show the current status of the purchase order. |
Comment |
This is a multi-line text field with word wrap (limited to 8,000 characters) where enter relevant information. Right click and add a comment in either View or Edit mode, even if the purchase is Finished. |
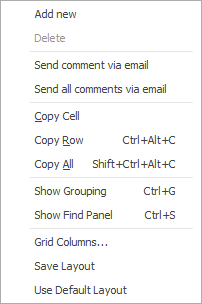
The following options appear when right clicking in any of the fields in the Comment grid.
Field |
Explanation |
|---|---|
Add new |
Adds a new line in the Comment grid. |
Delete |
Deletes the line that has been added to the job. |
Send comment via email |
Will send the selected comment via email. |
Send all comments via email |
Will automatically send all comments via email. |
Reply, Reply All, Forward |
Reply, reply all or forward email. |
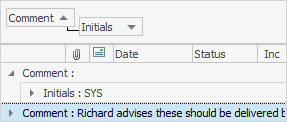
Show Grouping |
Adds the familiar list grouping option to the Comment grid so users can group by all available grid columns.
 |
Show Find panel |
Enables the Find panel, and provides the user the ability to search within the grid.
 |
Grid Columns... |
Allows adding more columns. Also allows removal of columns. Select the column to add, then drag it to the position required in the columns within the grid. To remove, click and drag to the Grid Columns... window, or drag down away from the header area. |
Save Layout |
Save the current column configuration. Administrators will be asked if they want to update the default layout for all users. Once saved, this will become the default layout. |
Use Default Layout |
Reset your grid layout back to its default layout. |
|
When a purchase order is sent electronically, a comment to that effect will be automatically added to the Comment grid. |
|
Security level governs whether or not a user can edit other people's comments within the Comment grid. |
Filters

Within the Comment grid, hover over a heading and a the Filter  image will appear. Click the filter icon to see a list of available filters to help refine the search. This is particularly useful when there are a lot of comments within the grid. These filters will only show comments within the grid specific to the filter chosen.
Column Filter |
Filter Choices |
|---|---|
Attachments |
All, Custom, No Attachments, Has Attachments. |
All, Custom, Comment, Email Replied, Email Forwarded, Email Read, Email Not Read. |
|
Date |
All, Custom, then shows all dates within the grid. |
Initials |
All, Custom, then shows the initials of all users within this field. |
Inc |
All, Custom, False. When this field is ticked, show comments on website. When a customer goes to the job on the website, this comment will show. Unticked = don't show. |
Status |
All, Custom, then shows all statuses within this field. |
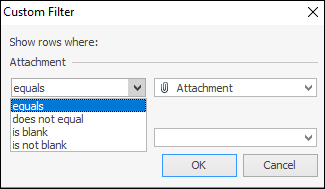
The custom filter choice allows to define the search further:
Spellchecker
Spell checker is usable within key text entry areas such as the Comment grid and Labour Entry screens. All spelling options are at a user level.
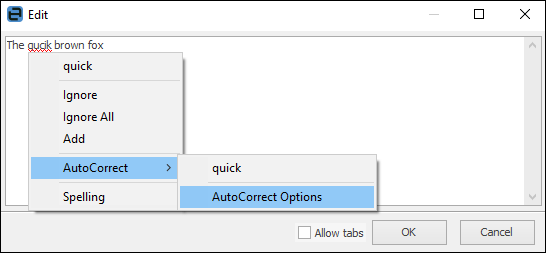
Autocorrect options can quickly be adjusted whilst within the spell checker by right clicking within the Edit screen:
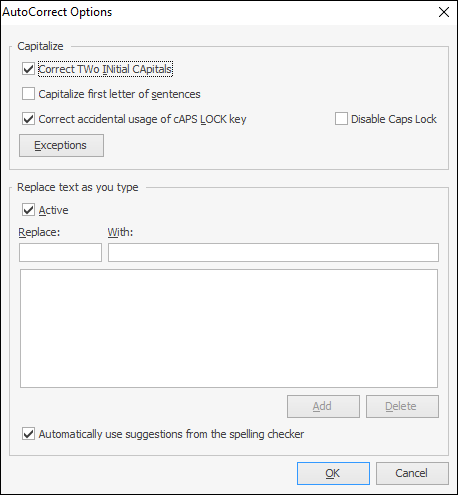
Among the autocorrect options is the ability to turn on or off the autocomplete function.
Note that autocorrect is off by default in a new Jim2 setup.
|
Spellcheck settings are per user. |
Further information
Purchase/Expense Order Footer Tabs
Purchase Order Approval Process
Opening Balance Purchase Order
Add an Amount to a PO when Finished at $0
Add Comments to a Purchase/Expense Order
Add Freight to a Purchase Order
Fix Incorrect Pricing after PO Finished
Handle Employee Reimbursements
Handle a Credit for Freight Charged
Link a Job to a Purchase Order
Link Expenses to a Purchase Order
Print a Purchase/Expense Order
Progress Payments on Purchase Orders
Record One Invoice Number on Multiple POs
Record Overseas Purchases, GST, Import Costs


