
Add prepayments and make refunds directly against a job without having to do so via Debtors. This is great for taking deposits from customers against a specific job, for processing lay-bys and general retail/purchase orders operations.
|
The payment will always go to Unbanked Funds. Cash refunds using the payment method of Tyro will also trigger the Tyro terminal. |
Payments can also be taken from customers for amounts outstanding. The job form displays the payments received and total balance owing. Related prepayments are automatically allocated (as credits) at point of invoicing.
Additionally, refund customers directly from a job or RFC (Return From Customer) without having to go via Debtors, avoiding the need to enable security on Debtors for sales and retail staff.
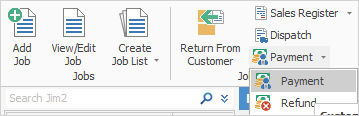
Both prepayments and refunds are located on the ribbon via Jobs > Payment.
There are two security settings related to the prepayments/refunds functionality. These are set via Tools > Security.
Security > Accounts > Debtors ▪Allow prepayments on jobs and cardfiles. ▪Allow refunds on jobs and cardfiles.
By default, both these security settings are disabled.
|
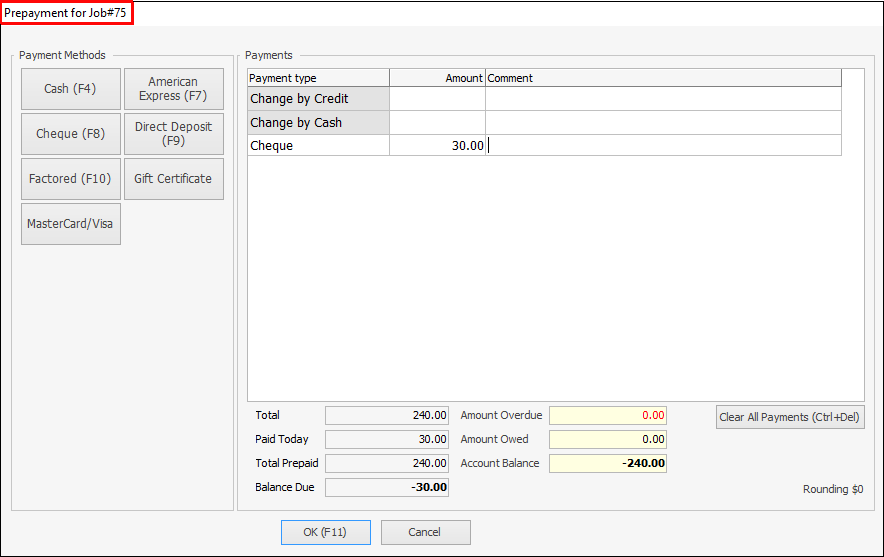
To take a prepayment against a job, open the job, then go to Jobs > Payment on the ribbon. The Payment screen will appear and the payment can be made in exactly the same way as taking payments at point of invoicing, except that the payment is linked to that specific job (see above image).
There is no limit to how many payments that can be made against a job, or what payment method(s) to use, including EFTPOS payments. |
The invoicing process of jobs with related prepayments is as per normal, with the exception that the related payments will automatically be applied. This is the same process as selecting Apply Credits on the Payment Details tab of the invoicing form. |
All payments via the above methods are accessible via Debtors, where they will appear as type Prepayment, not Credit. Additionally, the job number appears in the Document# column of the debtors payments grid. In this case right click on the payment and view the related job. The payments will always go via Unbanked Funds and will appear in Bank Deposits. If a workstation is associated to a Till, the payment will go via that Till. |
As with payments, refund a customer via Jobs > Payment > Refund on the ribbon.
The Select Prepayment(s) to Refund form will then appear, allowing selection of which payments to refund.
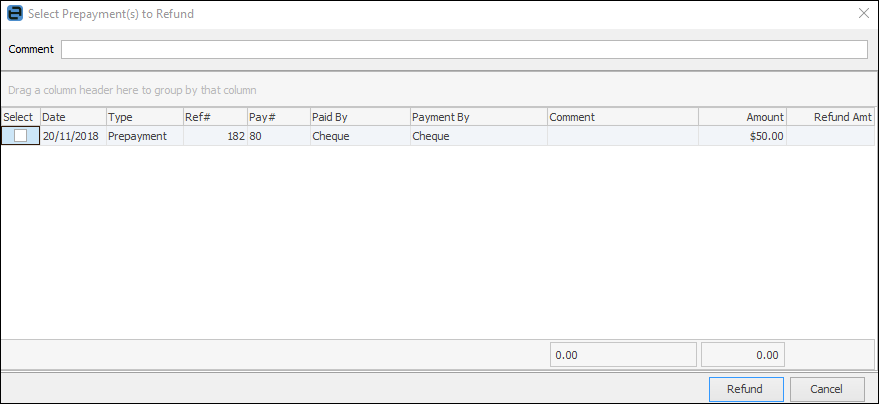
What is displayed differs depending on what is being viewed when selecting Refund as follows:
The Payment By is taken into account when doing refunds via this method, as the refund will be processed via the linked unbanked funds general ledger account and will appear in bank deposits as a negative figure. Only payment types flagged as Allow Negatives are available for refund. Refer to Tools > Setups > Banking > Payment Types.
Additionally, the refund payment type will always be the same as the payment type made at Prepayments. For example, if the customer originally paid by cash, the refund will be by cash.
More complex refunds will need to be processed via Debtors. For example, performing a refund by writing a cheque directly from a bank account. |
Further information
Add Stock to Job When Insufficient Stock
Auto Create Purchase Orders from Jobs
Charge Customer a Re-stocking Fee
Create a Job from a Similar or Previous Job
Create a Template for Recurring Jobs
Credit an Overcharged Customer
Export a Job Report to Spreadsheet
Export Labour Hours from a Job
Make Progress Payments and Claims
Select Serial Numbers on a Job
Stock Availability Allocation Process by List
Stock Availability by Location on the Fly